
NeQter Labs How to Guides
OpnSense
Step 1: NeQter Input Setup
1. Log in to NeQter and go to the NeQter Settings → Inputs.
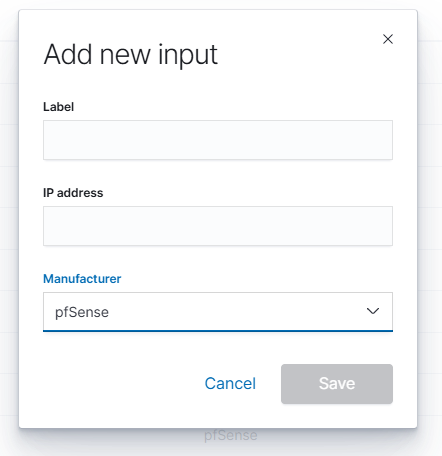
2. Click Add input on the top right corner and fill in the following information:
- Name: Any descriptive name (e.g., OPNsense-FW).
- IP Address: IP of your OPNsense firewall.
- Manufacturer: Select PfSense.
3. Click Save.
Step 2: NeQter Dashboard Setup
1. Go to NeQter Settings → Dashboards.
2. Expand the PfSense section.
3. Toggle PfSense to Enabled.
4. Click Apply changes.

Step 3: Opnsense Configuration
1. Log in to OPNsense.
2. Navigate to System → Settings → Logging on the left nav bar.
3. Open the Remote tab on the top navigation bar.
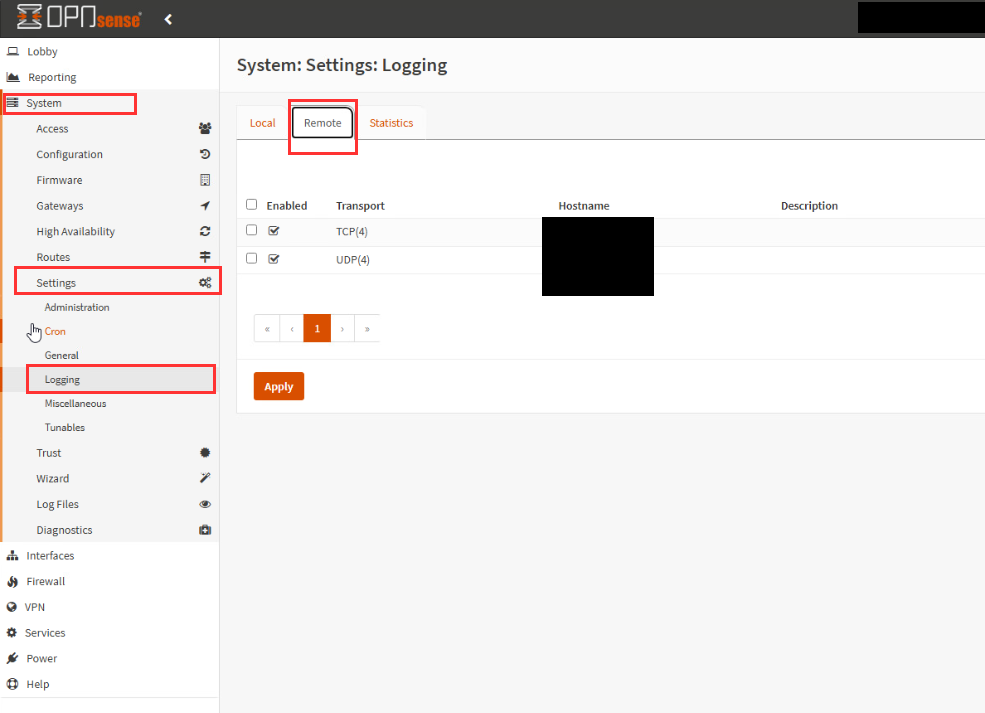
4. Click Add and configure the following:
- Enabled: Checked as enabled.
- Transport: Select TCP(4).
- Applications: Select required logs, or use Select All option underneath dropdown if unsure.
- Level: Select all except Debug (recommended to avoid noise).
- Facilities: Use Select All option underneath dropdown unless you have a specific filtering need.
- Hostname: Enter the NeQter IP address.
- Port: 514.
- rfc5424: Checked as enabled.
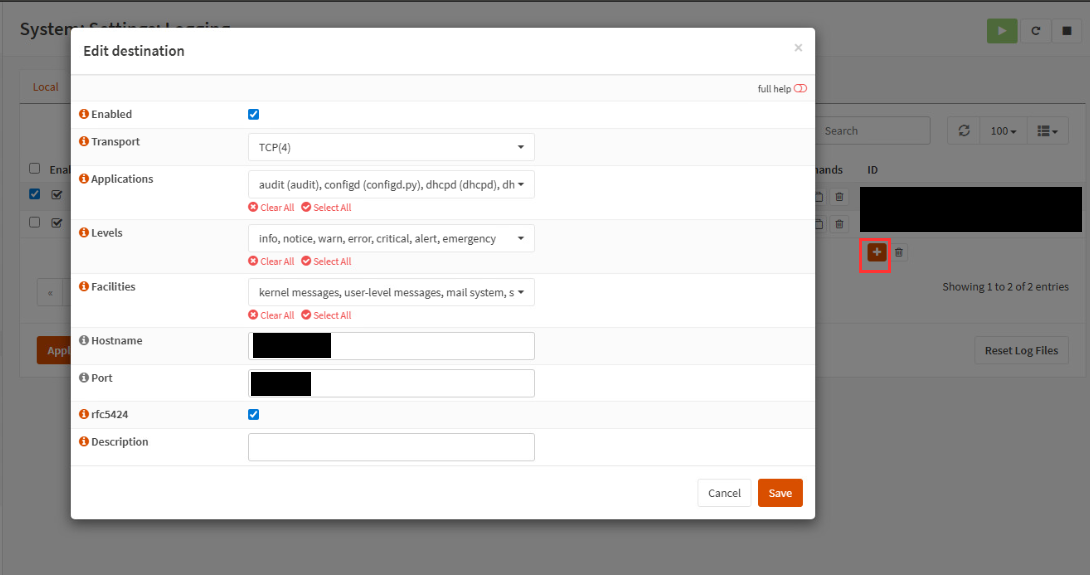
5. Click Save.
Barring misconfigurations, traffic should be see on the NeQter within an hour. If no new traffic is seen after following the above steps, contact support here for further assistance.