NeQter Labs How to Guides
Sophos XG / XGS
Step 1: NeQter Input Setup
1. Log in to NeQter and go to the NeQter Settings > Inputs page.
2. Click on the Add input button in the top right corner, fill in the following information:
- Name of the Sophos device (can technically be anything).
- IP Address of the Sophos device.
- select Sophos XG as the value for the Manufacturer.
3. Click Save to save your new input.

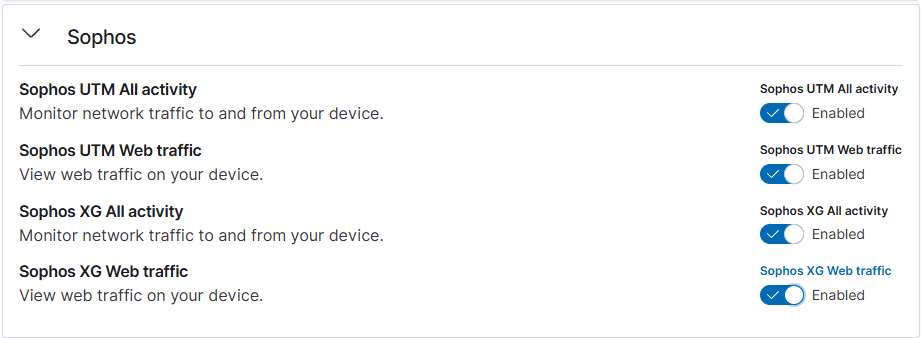
Step 2: NeQter Dashboard Setup
1. Go to NeQter Settings > Dashboards
2. Expand the Sophos dropdown and toggle the desired Sophos capabilities to enable them.
3. Save your changes at the top of the Dashboards panel by clicking Apply changes.
Step 3: Sophos XGS Syslog Forwarding Setup
1. Log in to your Sophos XG/XGS device and navigate to System Services > Log Settings.
2. Click Add on the top right to add a new Syslog Forwarder.
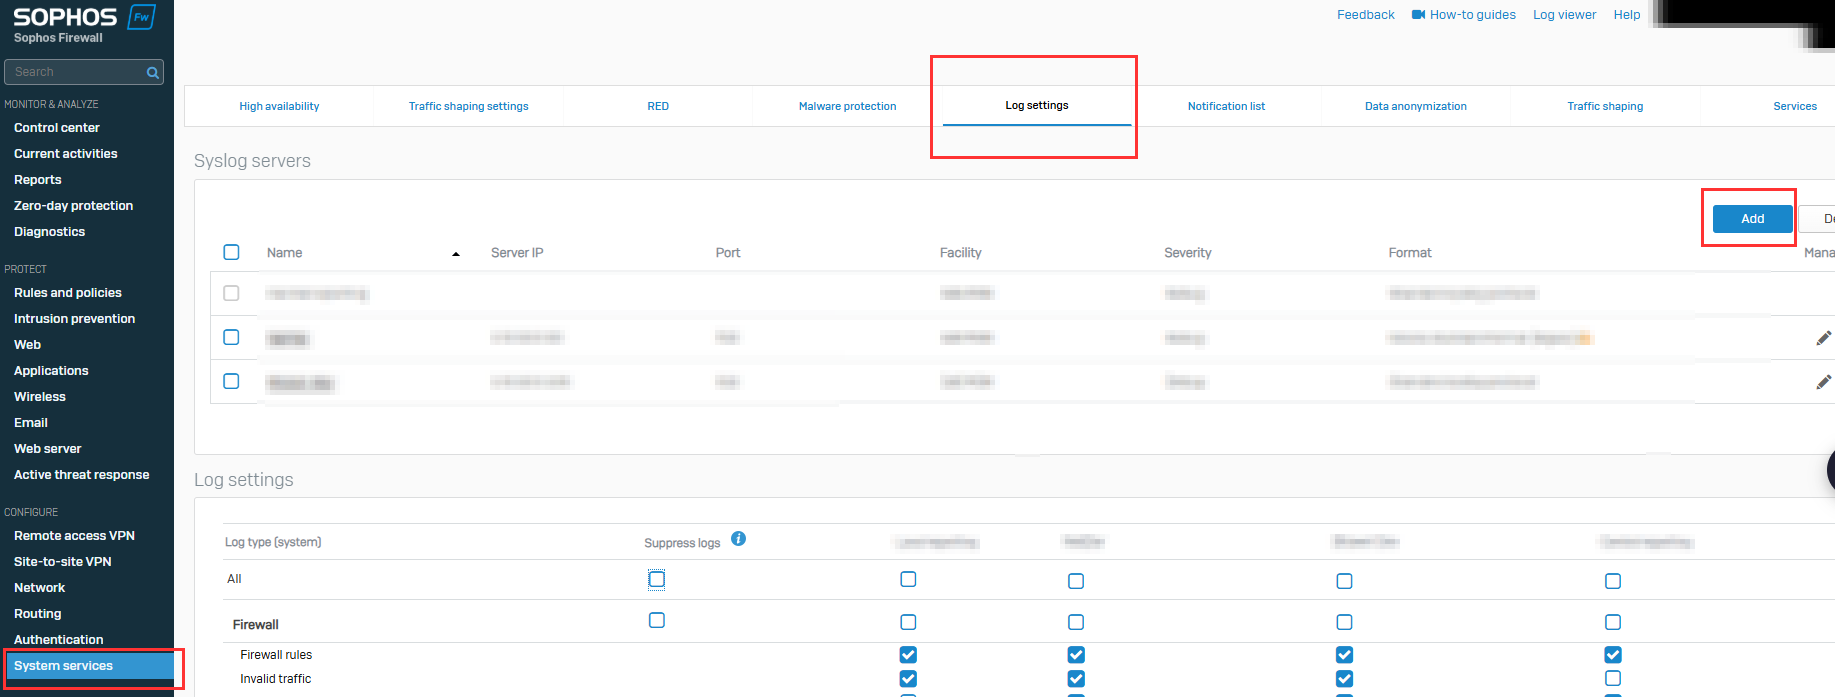
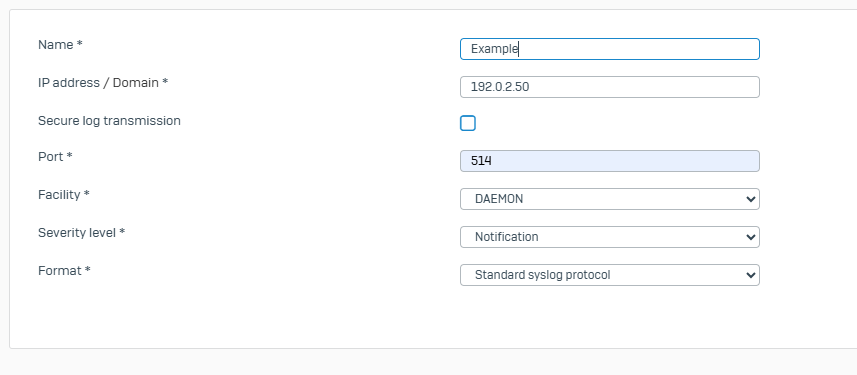
3. Enter the following data on this page:
- Name for the new Syslog Forwarder (can technically be anything) in the Name field.
- The IP Address of the NeQter Appliance in the IP Address field.
- The Port of 514 (or 6514 for secure TCP) in the Port field.
- Select the desired notification level. (We recommend the Notification level. Note: the Debug level has very high data output and can become noisy).
4. Click Save on the bottom left of the page.
Step 4: Sophos XGS Logging Settings
1. On the Sophos XG/XGS device, go to the Log Settings > Log Settings section.
2. Select the logs you’d like sent from Sophos to your NeQter appliance and click Save.
Barring misconfigurations, traffic should be showing up in NeQter within an hour. To create a ticket for assistance, click here.