NeQter Labs How to Guides
SentinelOne
Step 1: NeQter Input Configuration
1. Log in to the NeQter Appliance and go to the NeQter Settings > Inputs page.
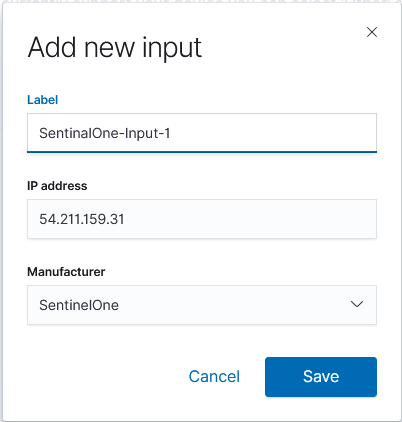
2. Add the following inputs for SentinelOne individually by clicking on the Add input button on the top right:
When filling out the form, for the name put down a name, no exact name required (could be s1-1,SentinelOne 1, SenOne IP1, etc or something similar), and for Manufacturer select SentinelOne. For the IP Address, have each of of the IPs below be a individual input:
- 52.200.100.203
- 3.213.115.5
- 54.211.159.31
- 54.160.219.31
- 52.4.126.188
- 54.211.162.22
- 52.2.239.24
Step 2: NeQter Dashboard Configuration
1. Navigate on NeQter to NeQter Settings > Dashboards.
2. Toggle the “enable” switch underneath SentinelOne.
3. Click Apply Changes on the top of the page.

Step 3: Firewall Configuration
On the Firewall / Router, setup a Dynamic NAT rule to have port 6514 traffic from the IPs listed under Step 2 pointed to NeQter’s ip address. Keep source ip and port the same.
NOTE: This process will be different depending on the Firewall, if assistance is needed please contact support@neqterlabs.com
Step 4: SentinelOne Configuration
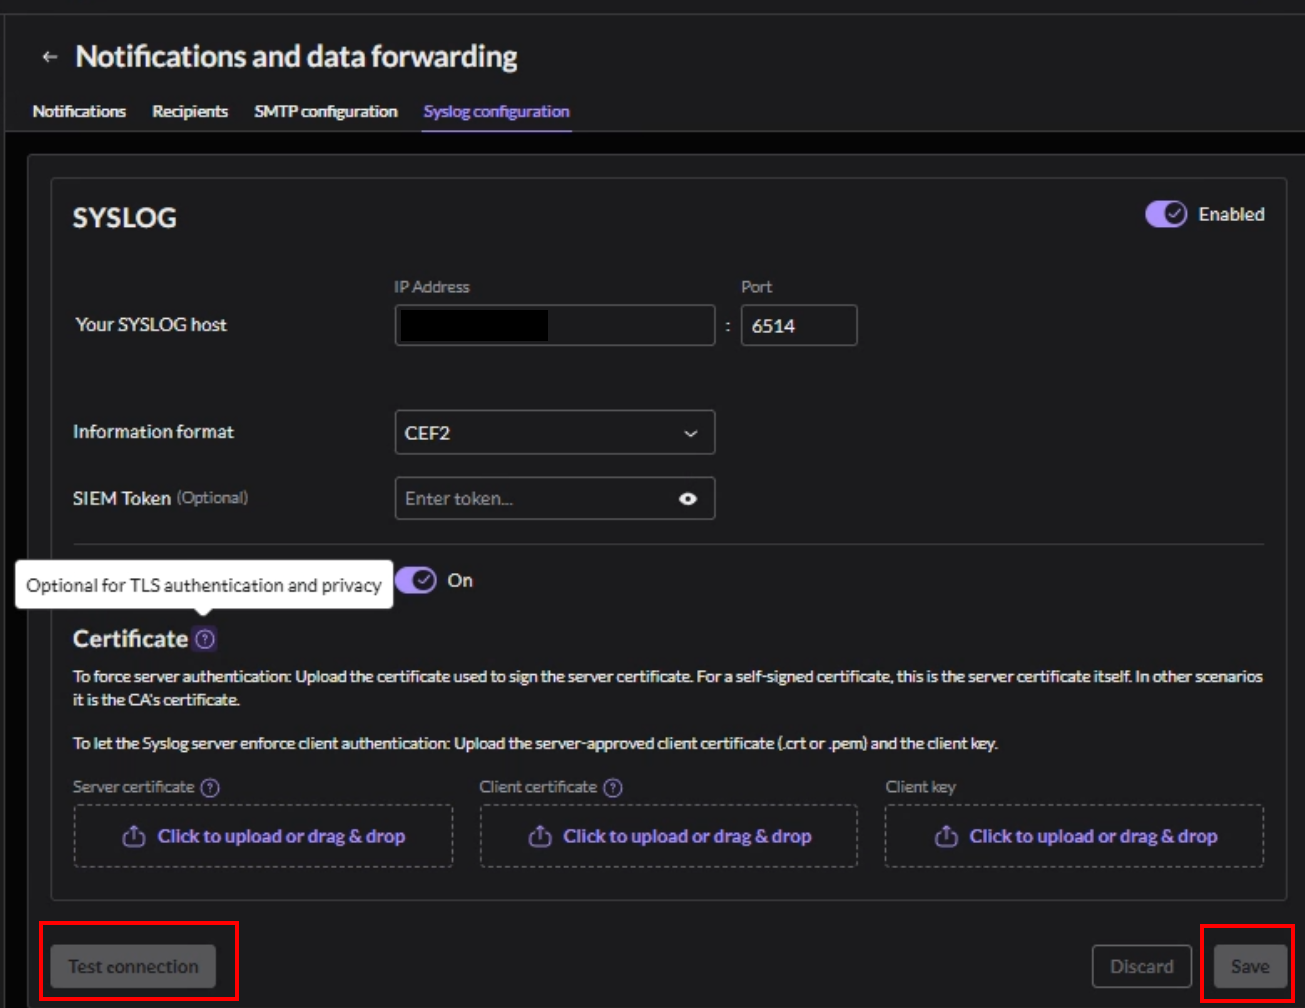
1. Logon to the SentinelOne WebUI and go to INTEGRATIONS > Notifications and Data Forwarding.
2. Go to the Syslog Configuration Tab.
3. Enable syslog and fill in the following fields:
- Put in the WAN IP Address of your network for the Yours Syslog Host field.
- For the port enter 6514.
- Change the Information Format to CEF2.
4. Enable TLS and then press Test Connection (Certificates are not required).
5. Within a few minutes a log should be seen on NeQter. If none is found within a 5-10 minute timeframe, check the steps above and verify nothing was misconfigured. If issues are still occurring, please create a ticket here with NeQter for further assistance. If a Test Log is seen under Discover on the NeQter Appliance then that means SentinelOne is configured and working.