NeQter Labs User Manual
Table of Contents
Compliance
The Compliance tab is where you can create a System Security Plan (SSP) to better help you keep on track to becoming compliant with either NIST SP 171-800 or CMMC or possibly both. When you click on the page you will find two tabs on top, one called “Create” and another called “Help”. Help is where you can find references and guides to better help you become compliant and Create is where you are directly led to the SSP creation page. You also have Create an SSP and View References & Help in the center of the page itself which preform the same roles. You also have Migrate Data where you can import / export SSPs to and from your NeQter System.
Creating an SSP
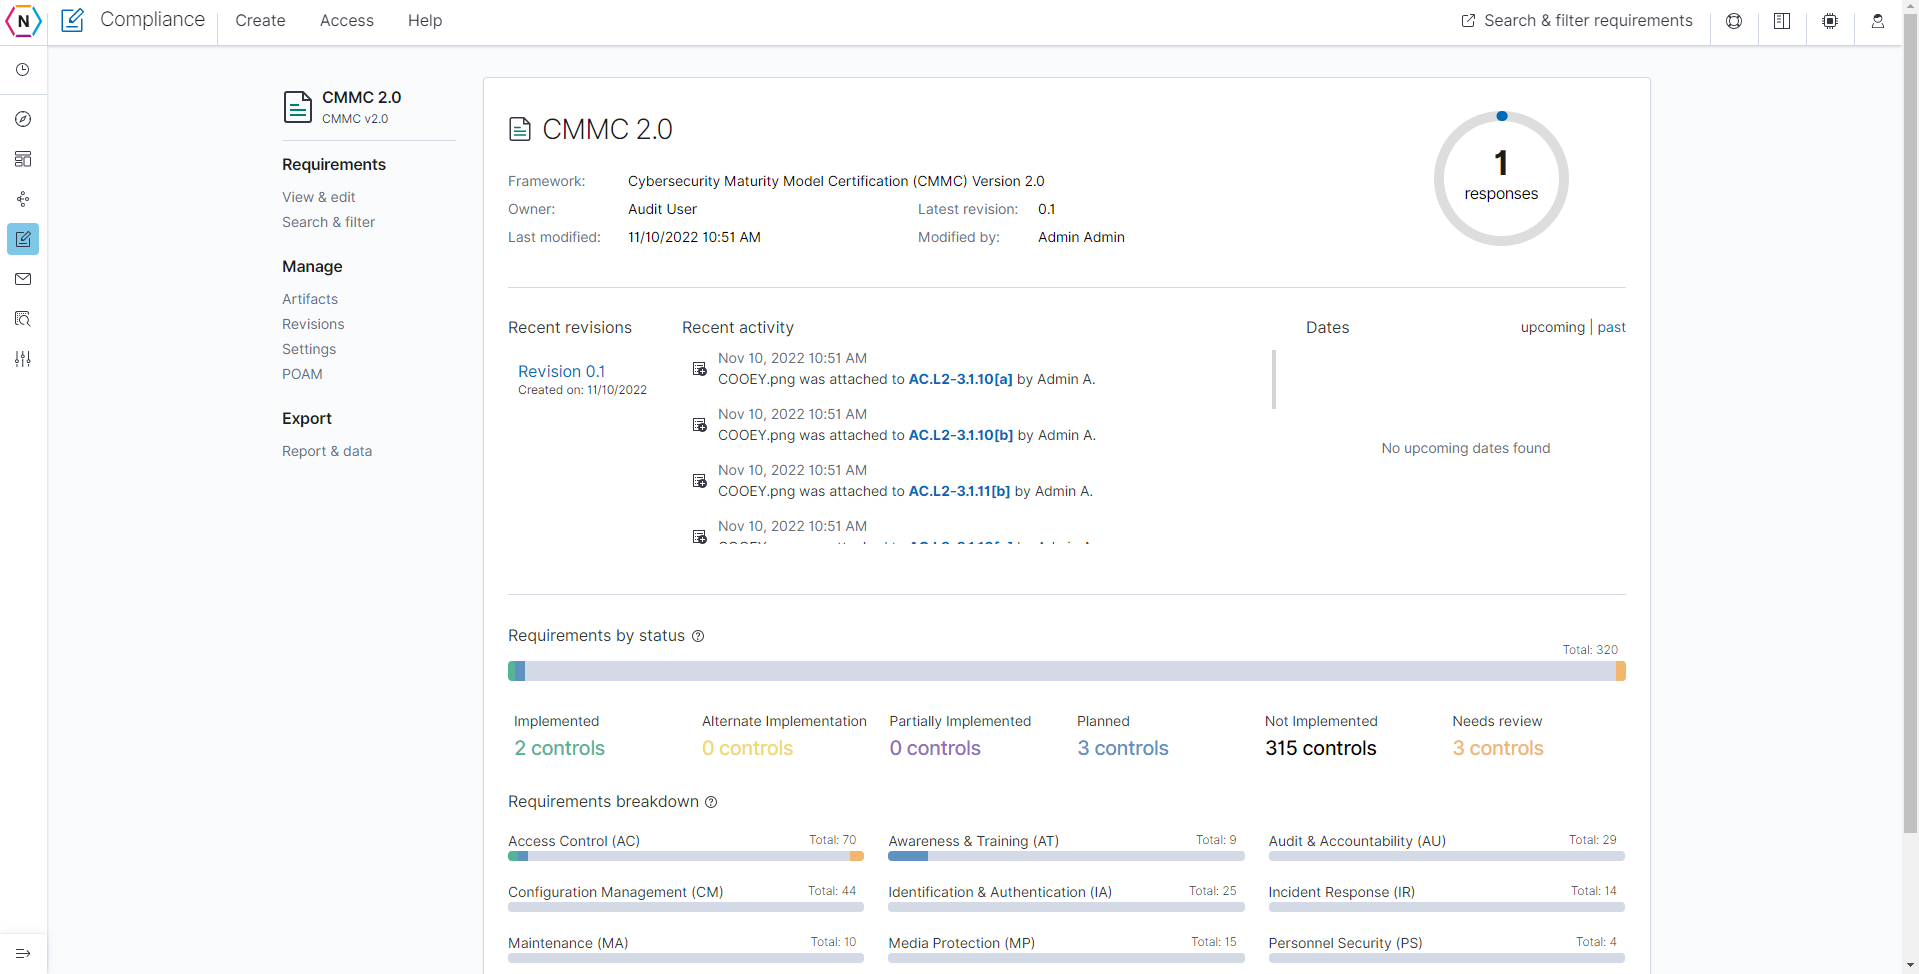
The first step to creating an SSP is to either click the box titled “Create an SSP” or click the Create tab on top. From there you will see a few options. First is the name of the SSP which is where you can assign an title to your new SSP document (it should be named something relevant to its usage).
Next you have Owner where you can assign the owner of the SSP. The owner will have full control over permissions to modify, configure and export the SSP. By default it will be the administrator account of the client. Finally the framework is where you can choose whether or not the SSP will be for CMMC or NIST SP 800-171.
NOTE: If you select CMMC as your framework there will be a dropdown menu to the right of the title which allows you select which level of CMMC Compliance you wish to have an SSP use, both Level 1 & 2.
Once you have everything setup to your specifications, click the Create SSP button on the bottom of the page to finish creating the SSP.
Navigating through the Compliance Page
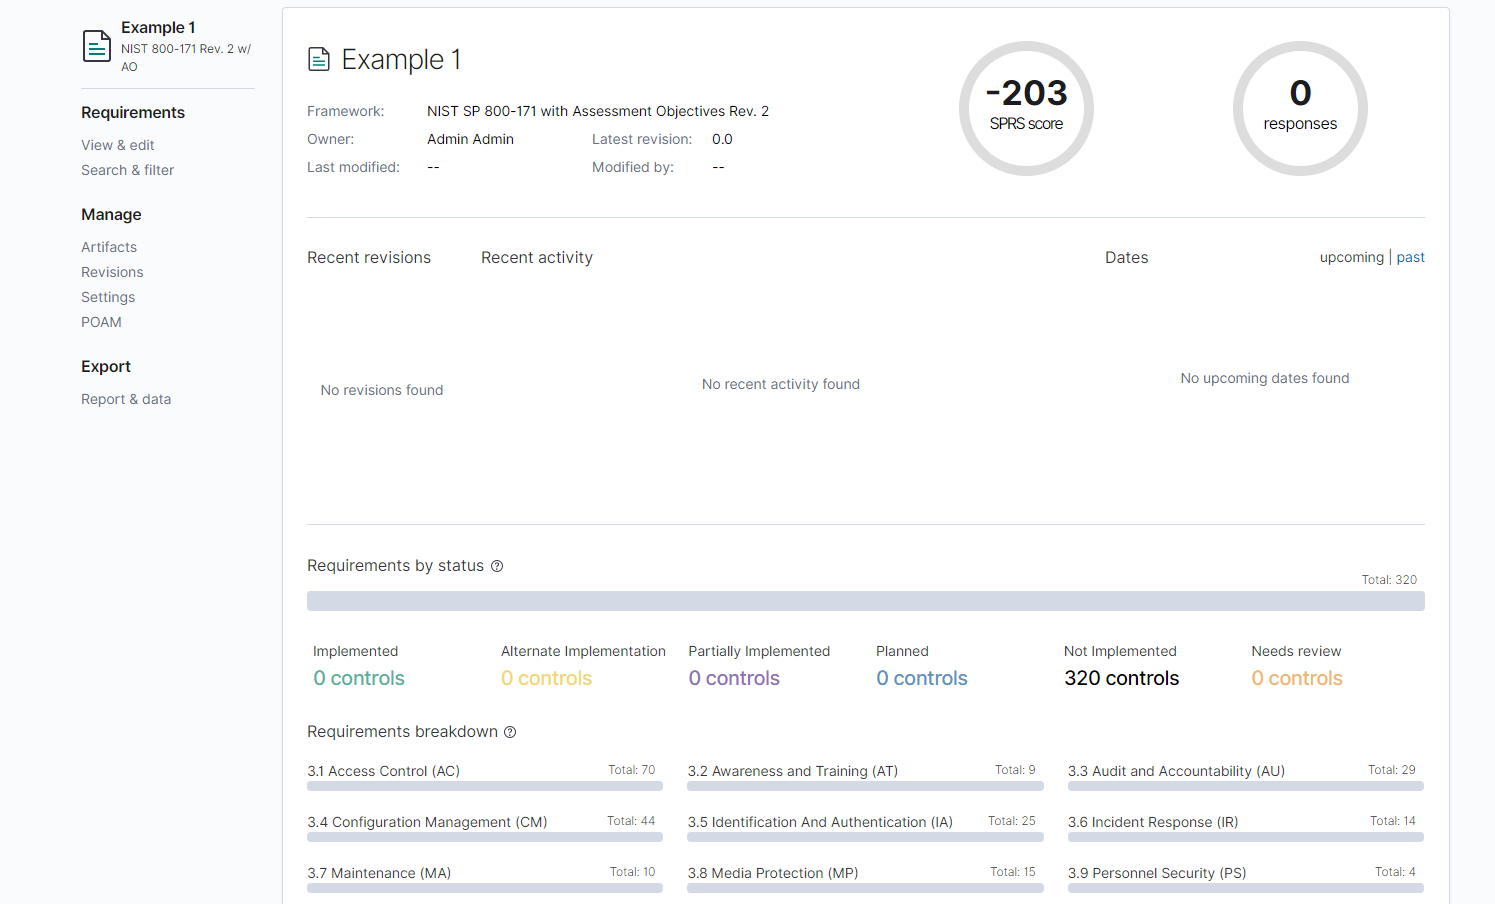
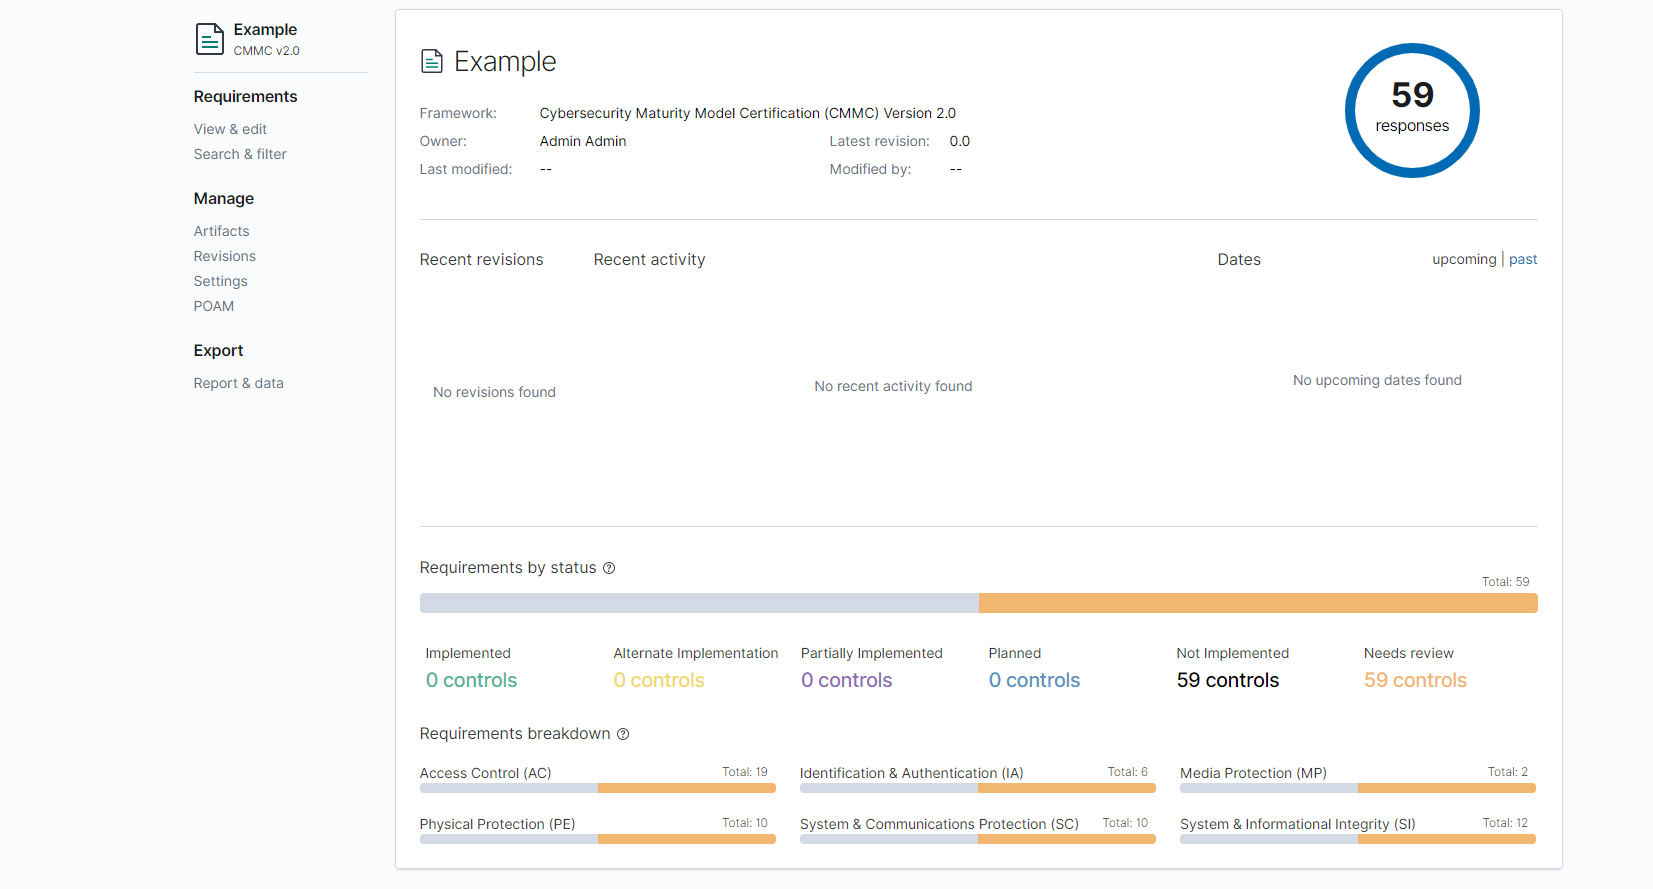
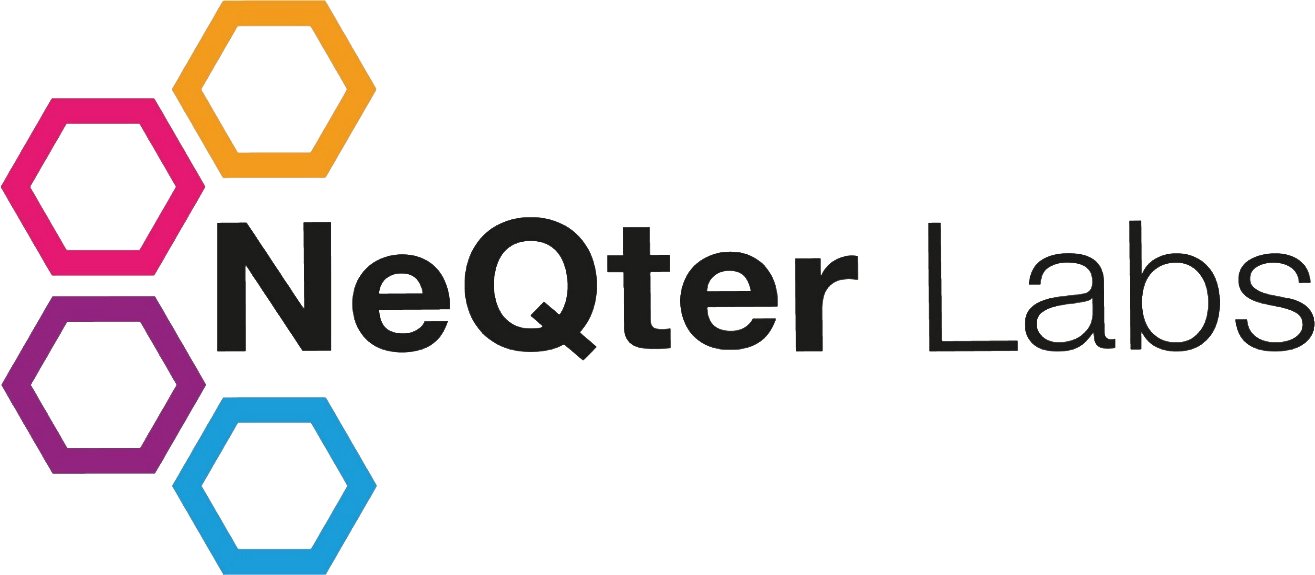
The SSP page is where you can get a general overview of the current progress of your CMMC / NIST Security Plan and how much you have you have finished / need to finish in order to be compliant. There will be a list of requirements as well which can be clicked on to expand and see the different items that are required to be completed before any particular requirement of the CMMC / NIST Guideline can be considered implemented.
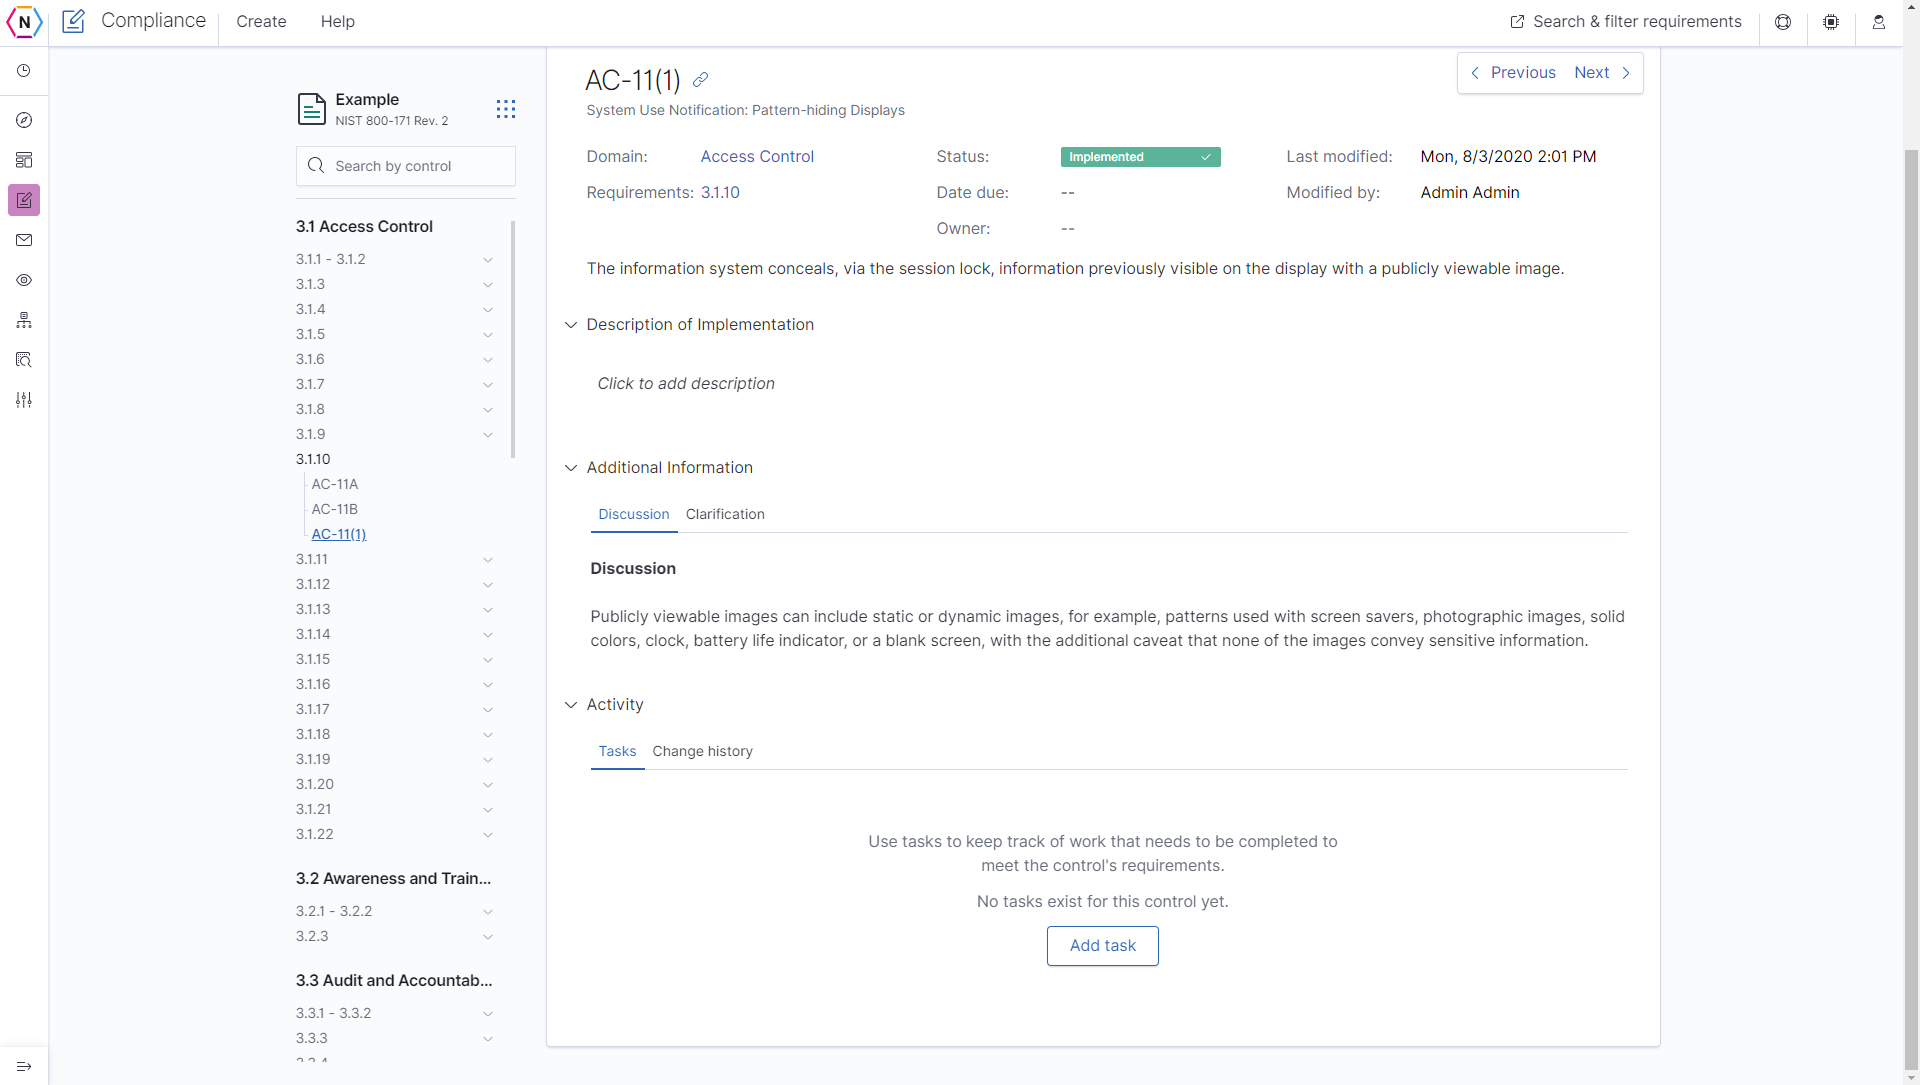
It is under each of these smaller sections that you can set the status of each requirement, the date it is due to be implemented, the owner of said requirement, your description for how it will be / is currently implemented and tasks that can be created in order to help keep you on track to becoming compliant with said requirements.
Returning back to the main page of your SSP you will see a side bar which will contain a few different tabs.
View & Edits:
Where you can view and edit different parts of your SSP. When clicked, it will bring up a list of controls you can select from and use to navigate to different parts of your SSP.
Search & Filters:
When clicked brings up a similar table to the one used for Views & Edits with the main difference being that you can create filters to help find specific controls easier.
Artifacts:
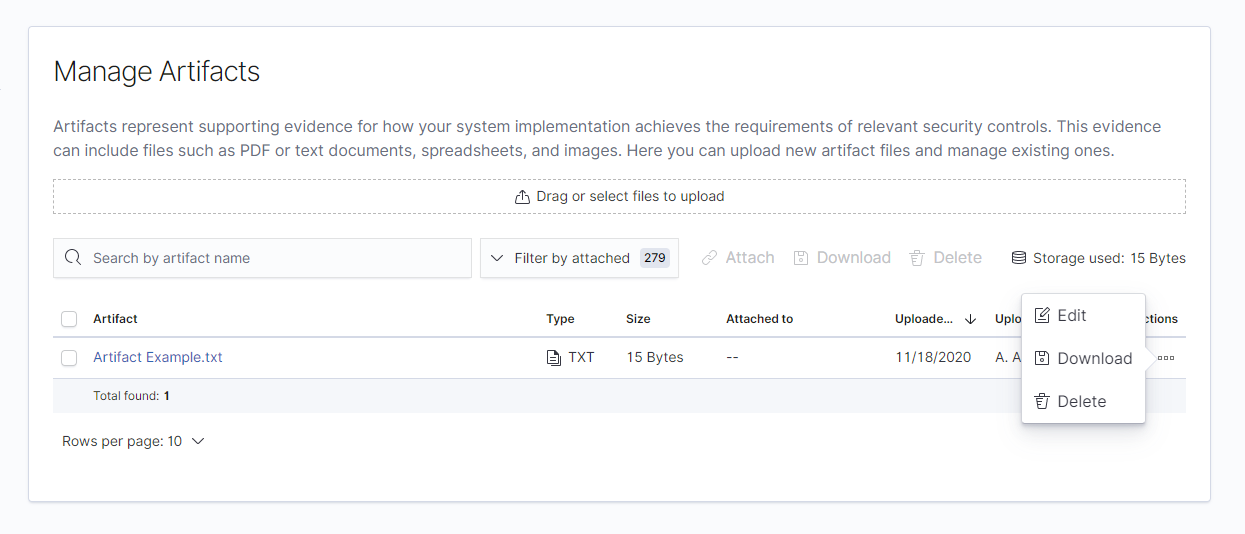
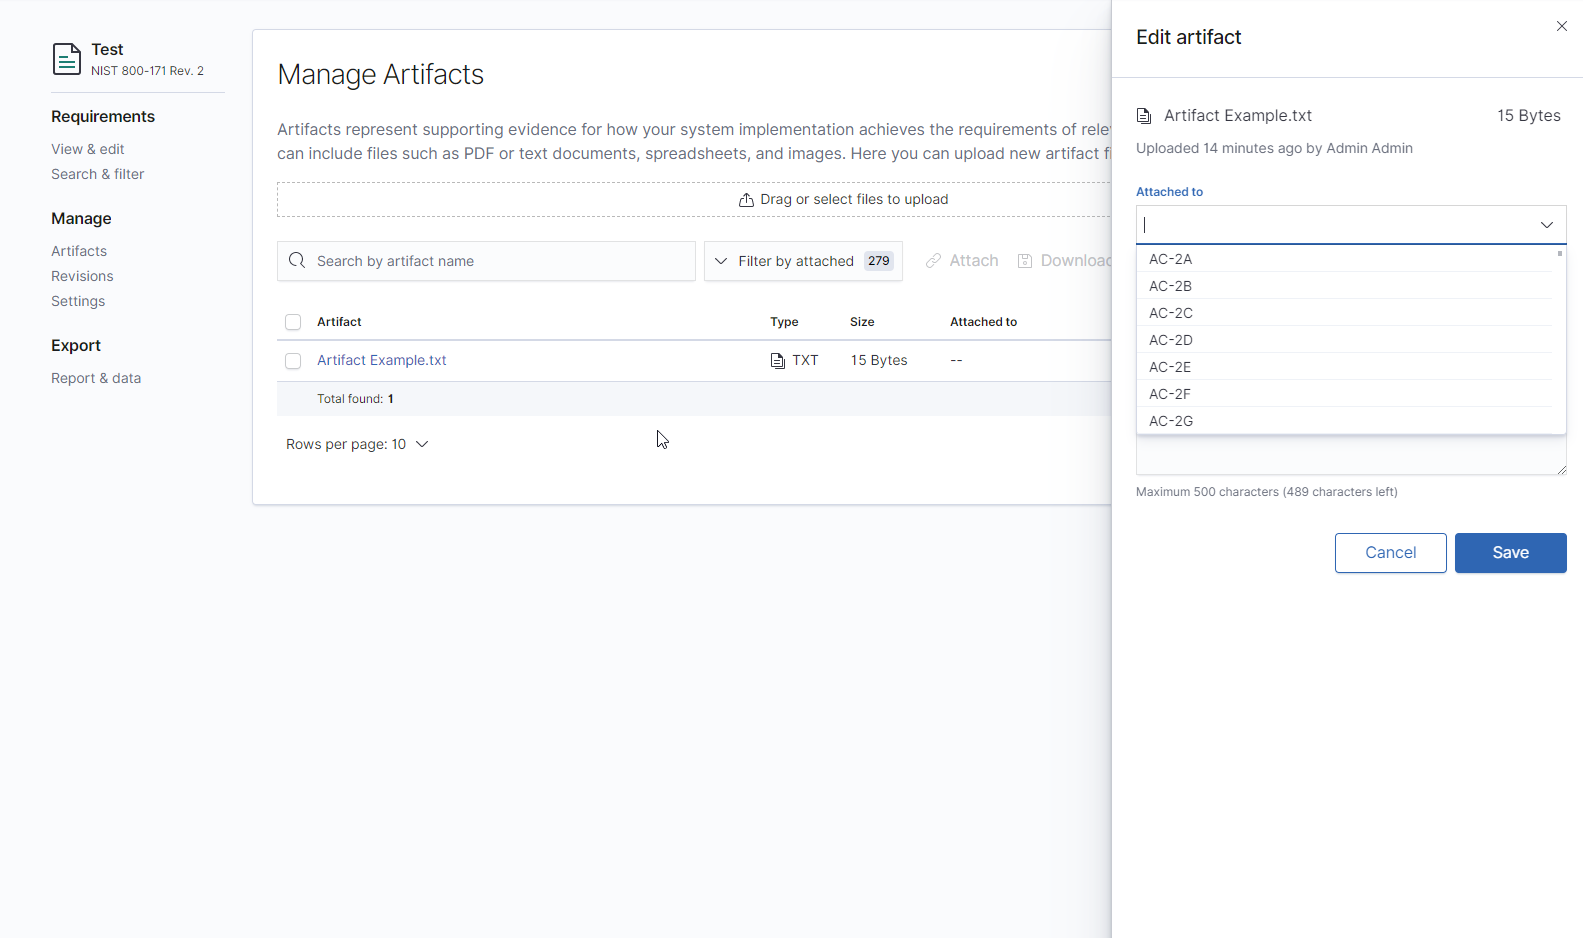
The Artifacts page is where you can upload supporting evidence of how your system implementation achieves the requirements needed for compliance. Files such as PDFs, Text Documents, Spreadsheets, Images and more can all be imported and exported from this page.
You can also edit Artifacts to have both a description and have them be attached to a specific requirement in your SSP.
Tasks:
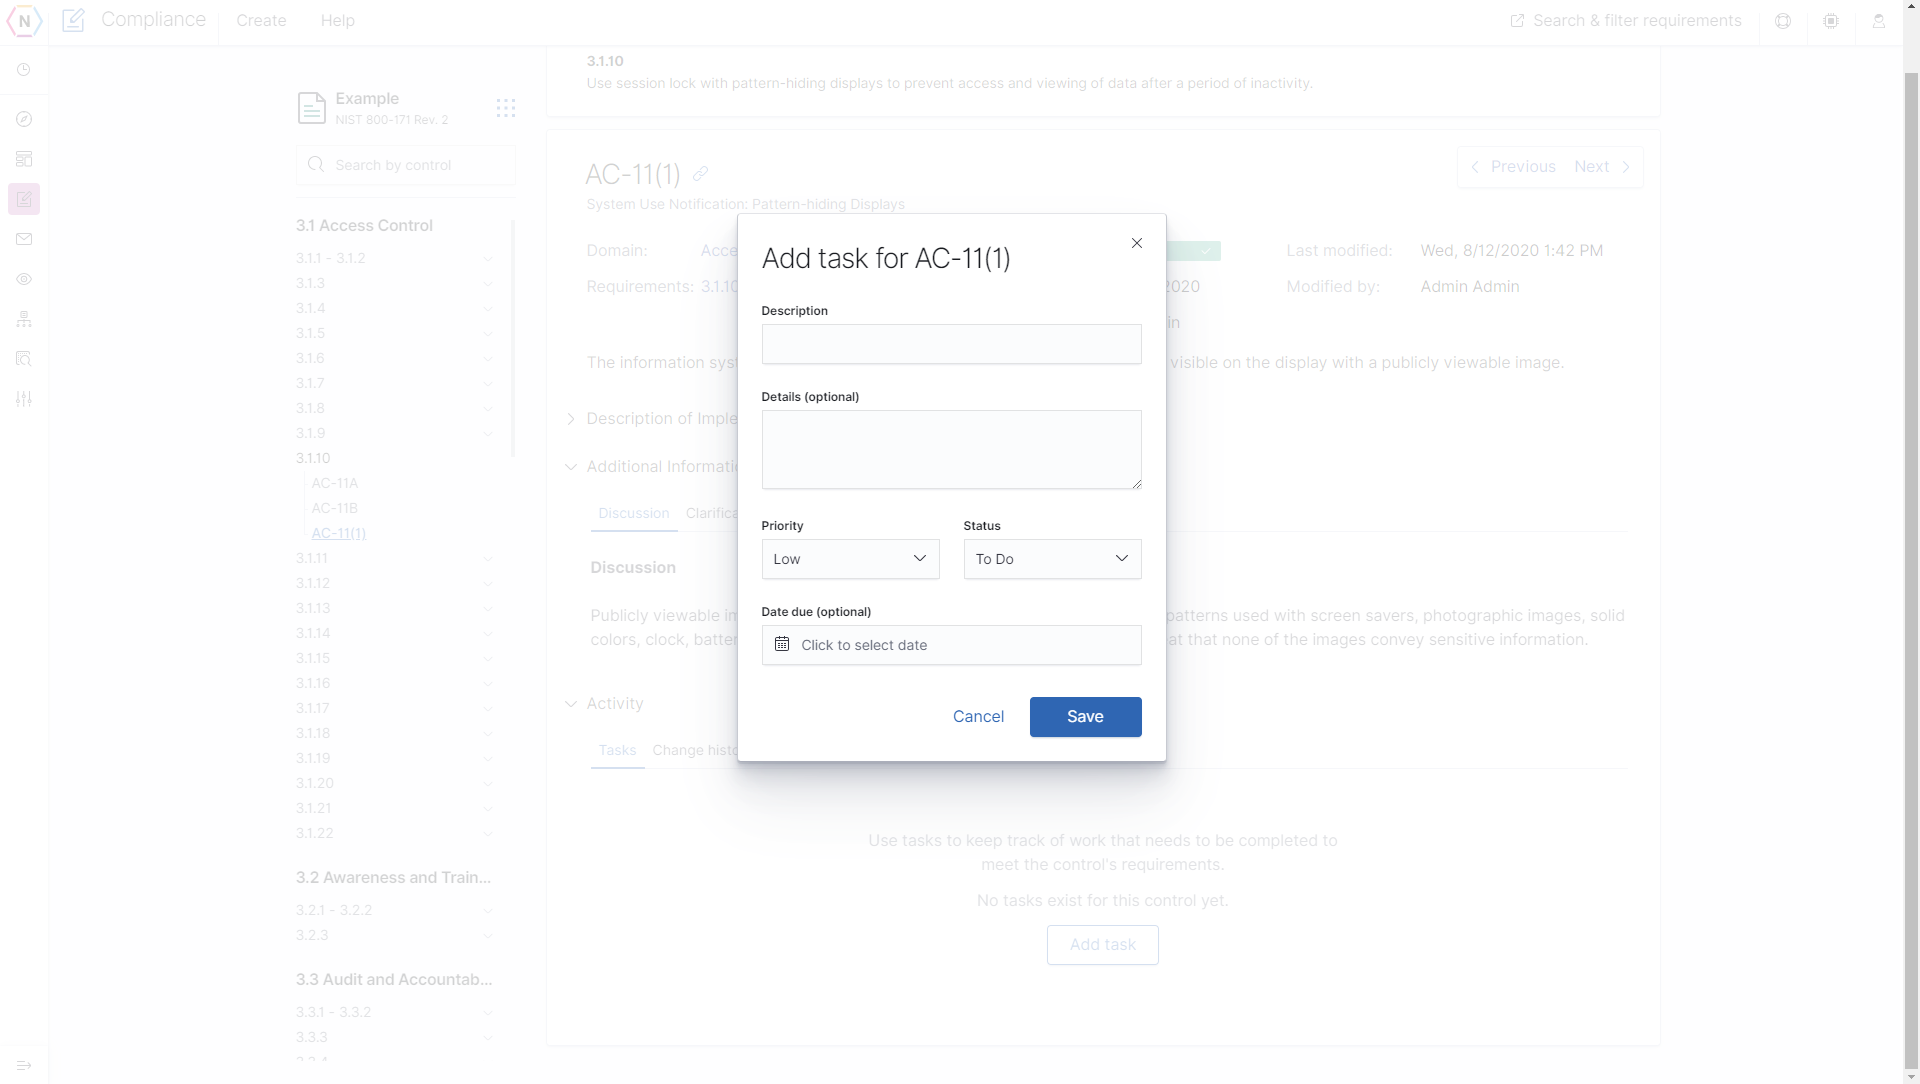
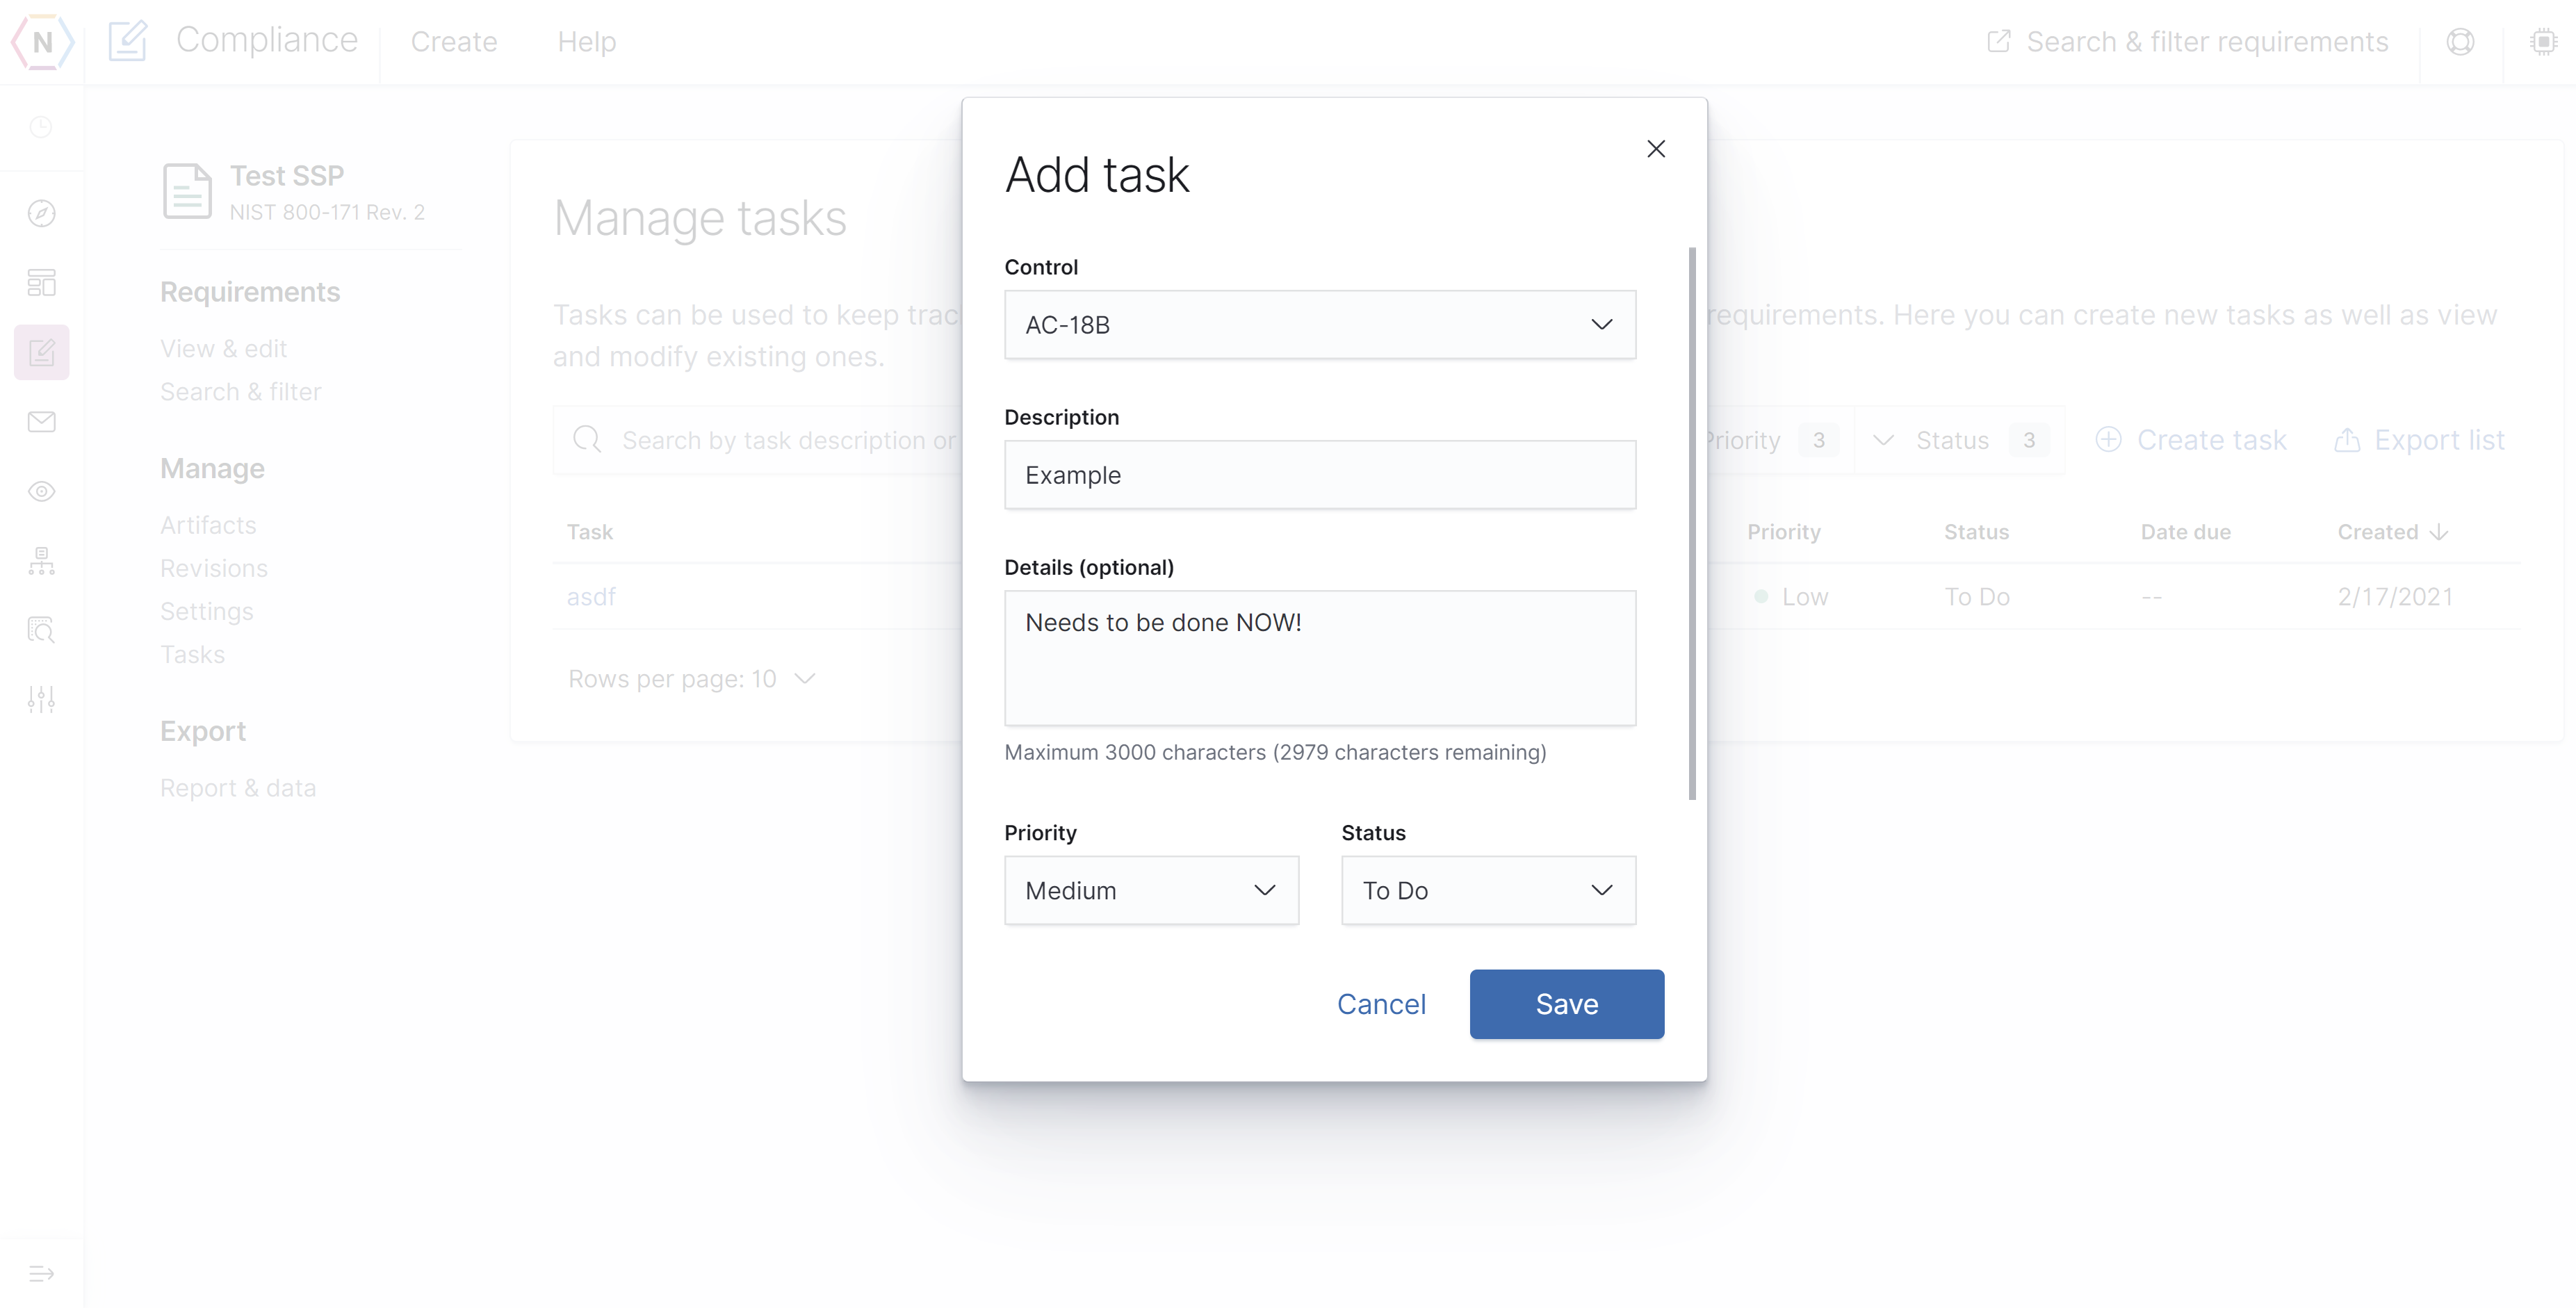
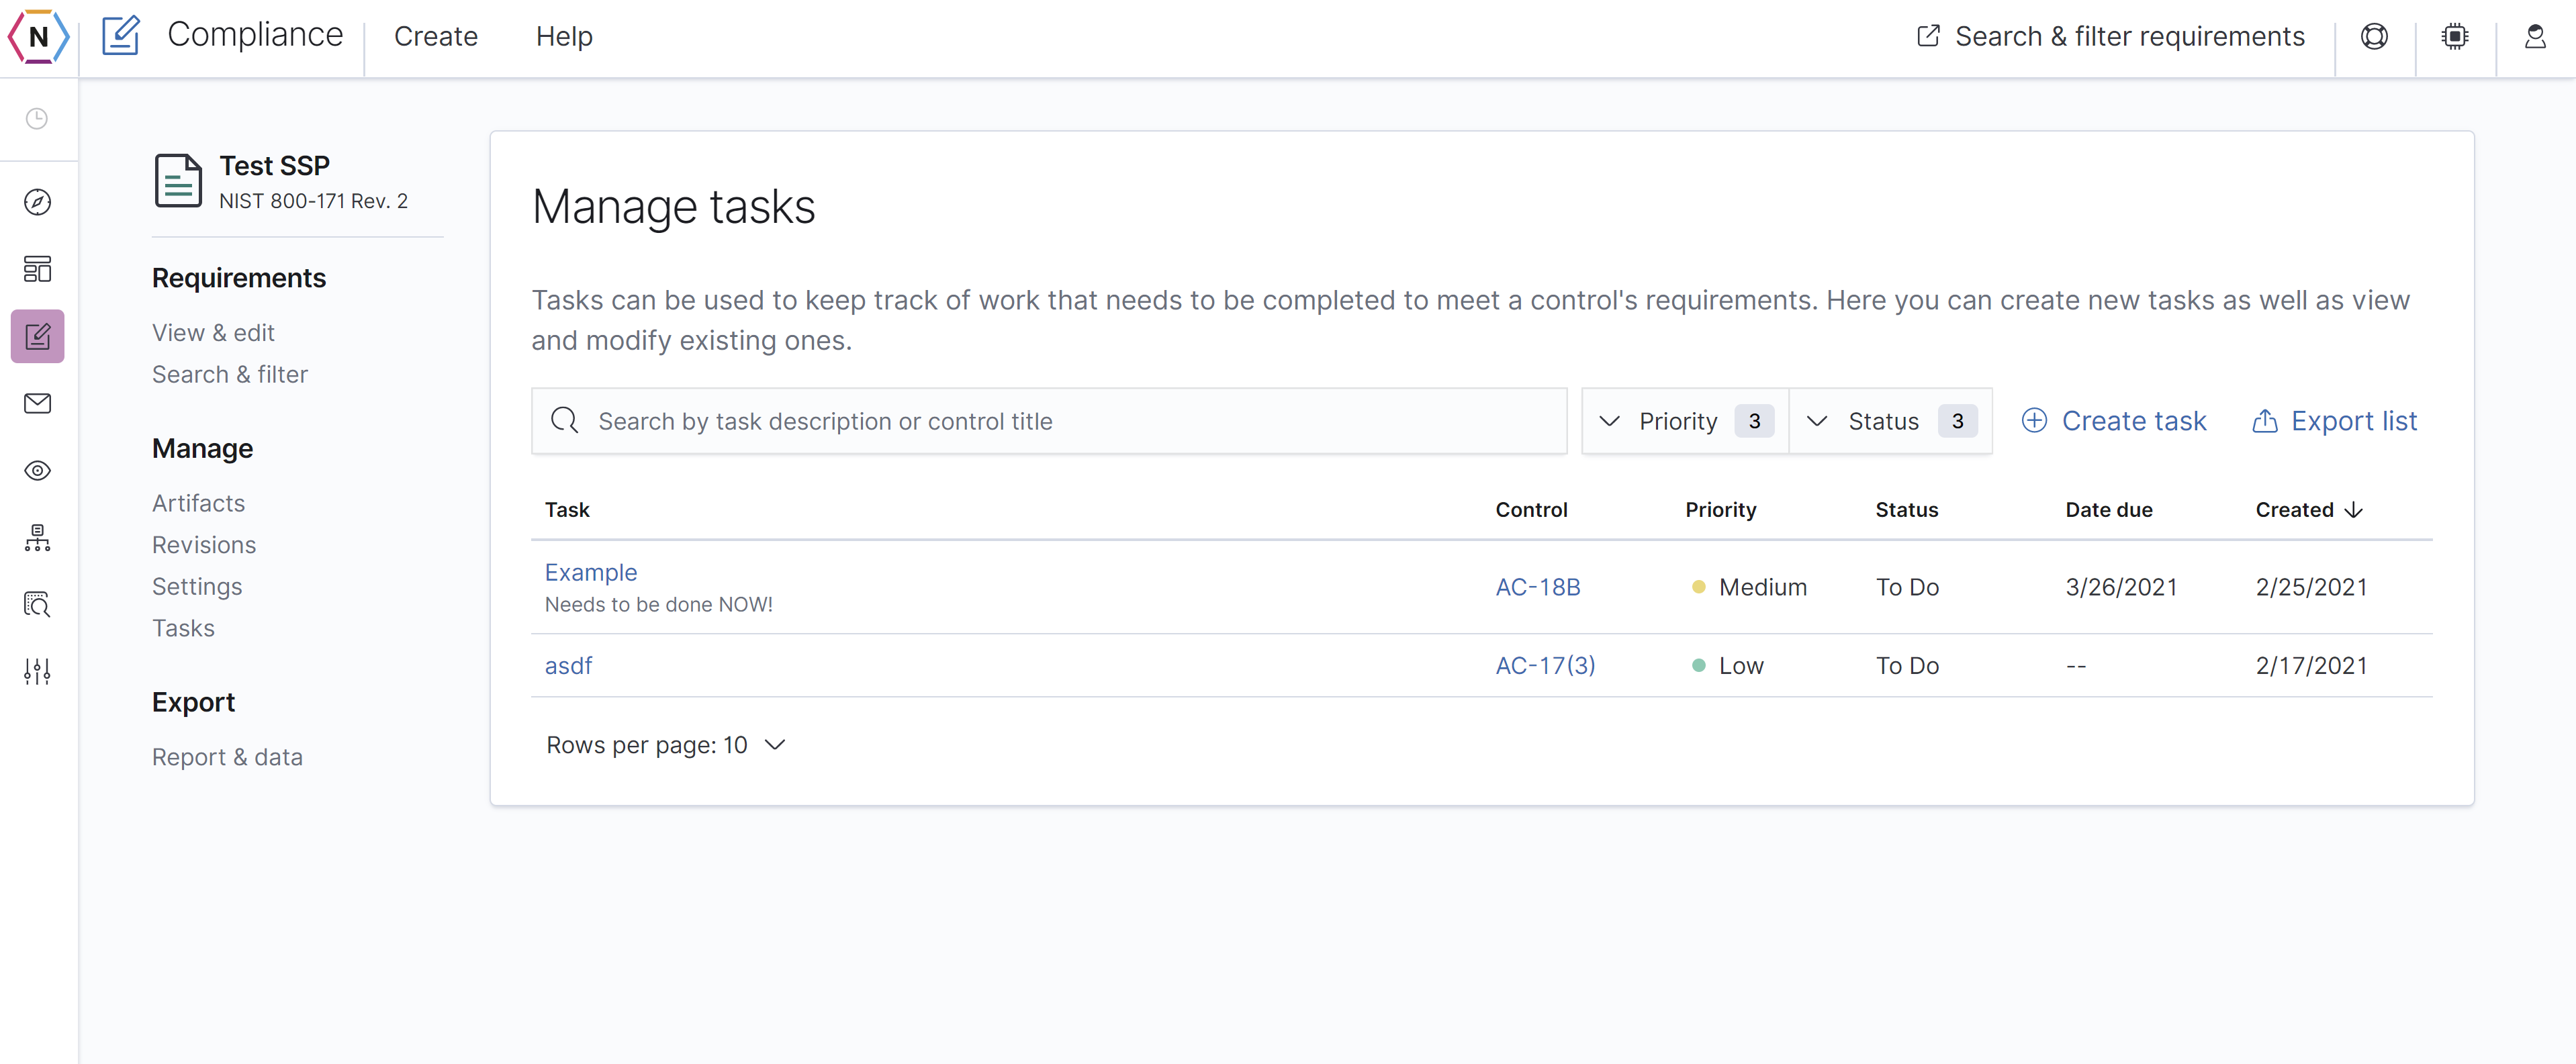
The tasks page is where you can get an overview of all the tasks you’ve created in your SSP. From here you can also edit and create tasks from one centralized location. To create a task simply click on the Create Task button on the top right of the task list. From here you can choose which control you’d like to have the new task under, its name and details, the severity level, status and due date!
Once you have a task done click Save and you’ll see it added to your list of tasks.
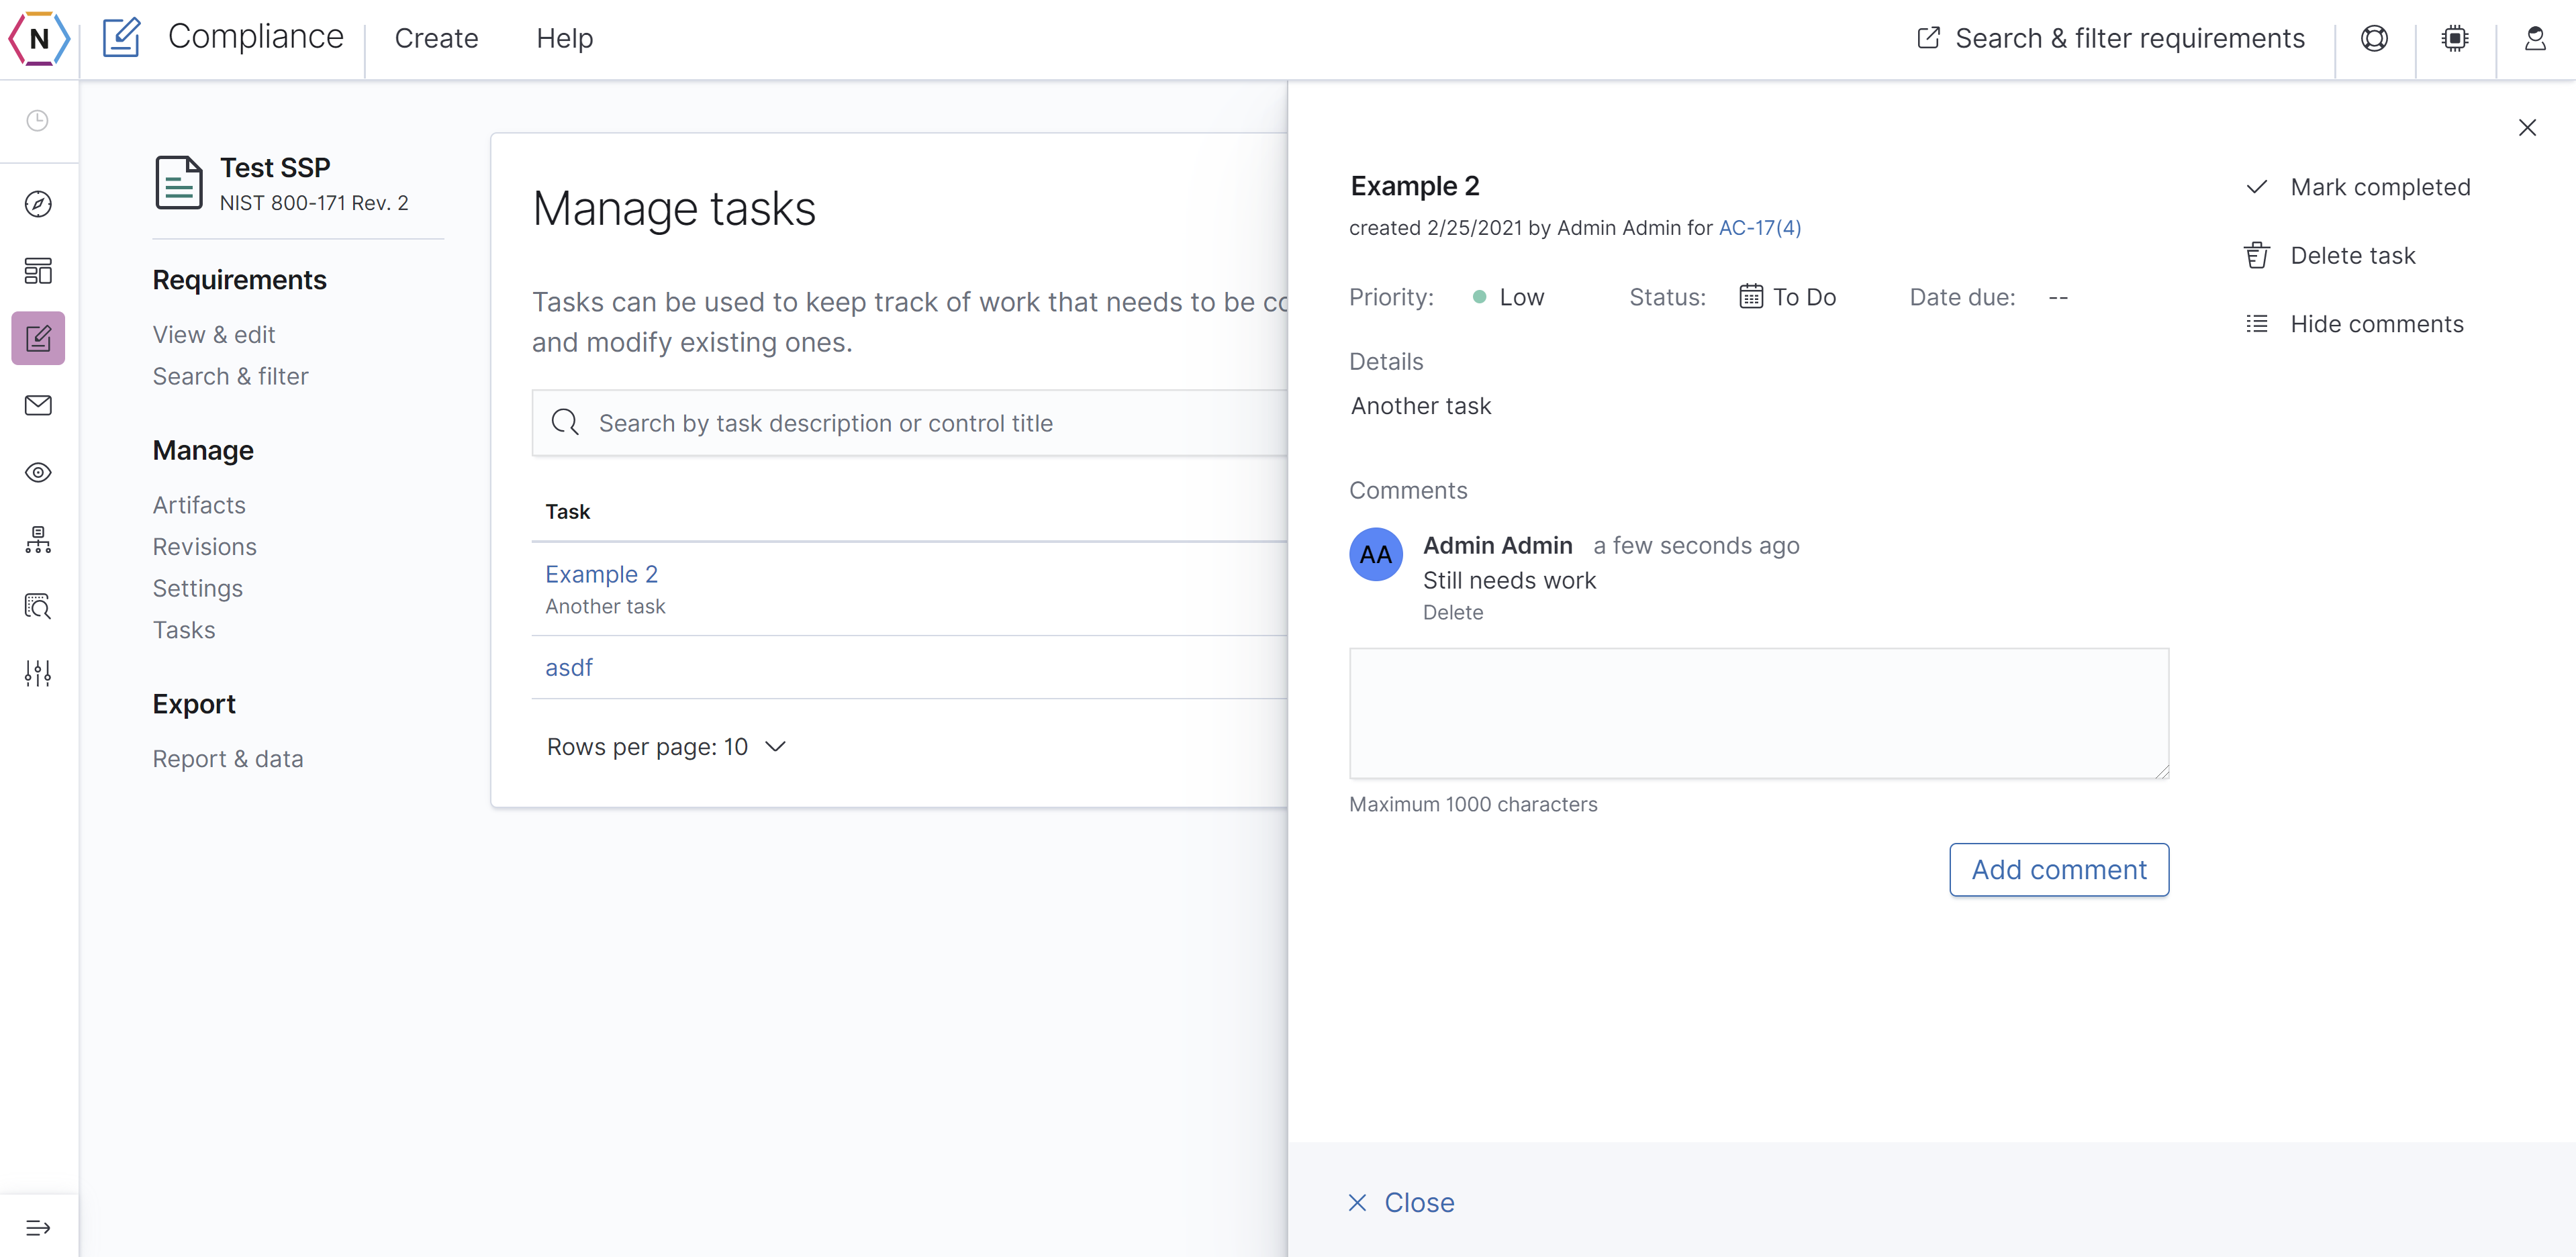
You are also able to edit your tasks by clicking on the task name, from here you are able to change almost all details of your task as well as add comments to it.
Revisions:
Where you can create snapshots of your SSP to help keep track of changes to your SSP.
Settings:
Where you can change your SSP’s Name, Owner as well as where you can delete your SSP if you no longer wish to use it.
Report & Data:
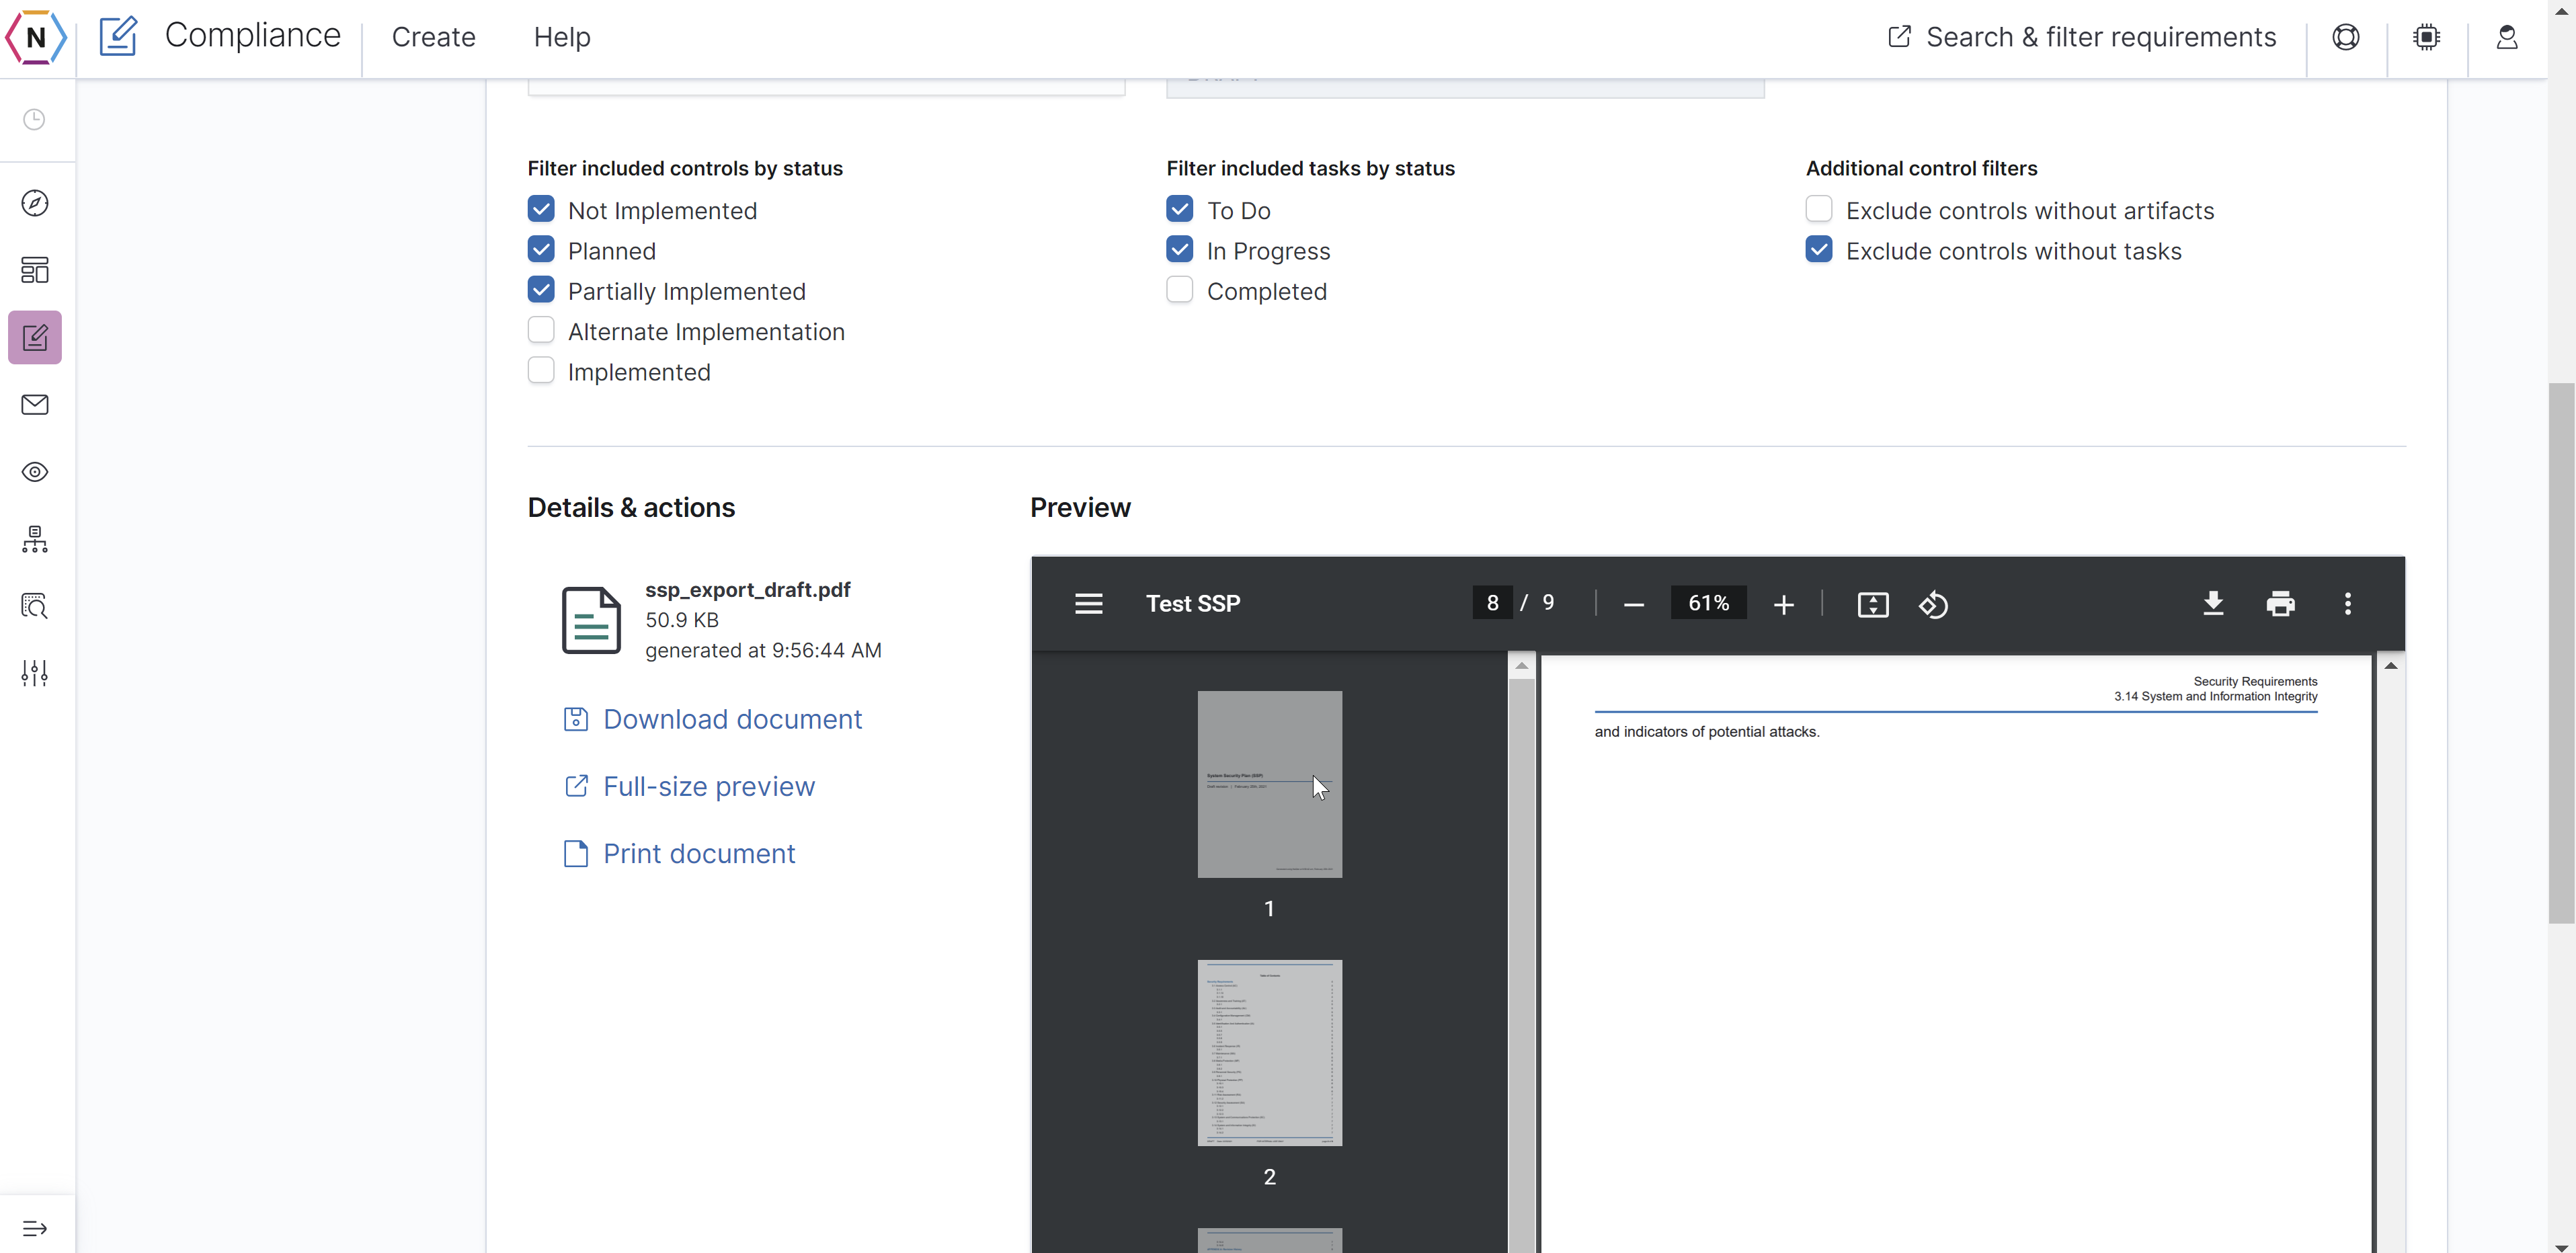
Where you can export your SSP from your client. You can have it use your latest version or a past Revision. You can also have it sent via PDF or CVS Format. Once you have it all set up click the generate button and then wait for your form to be created and then click download document or print document.
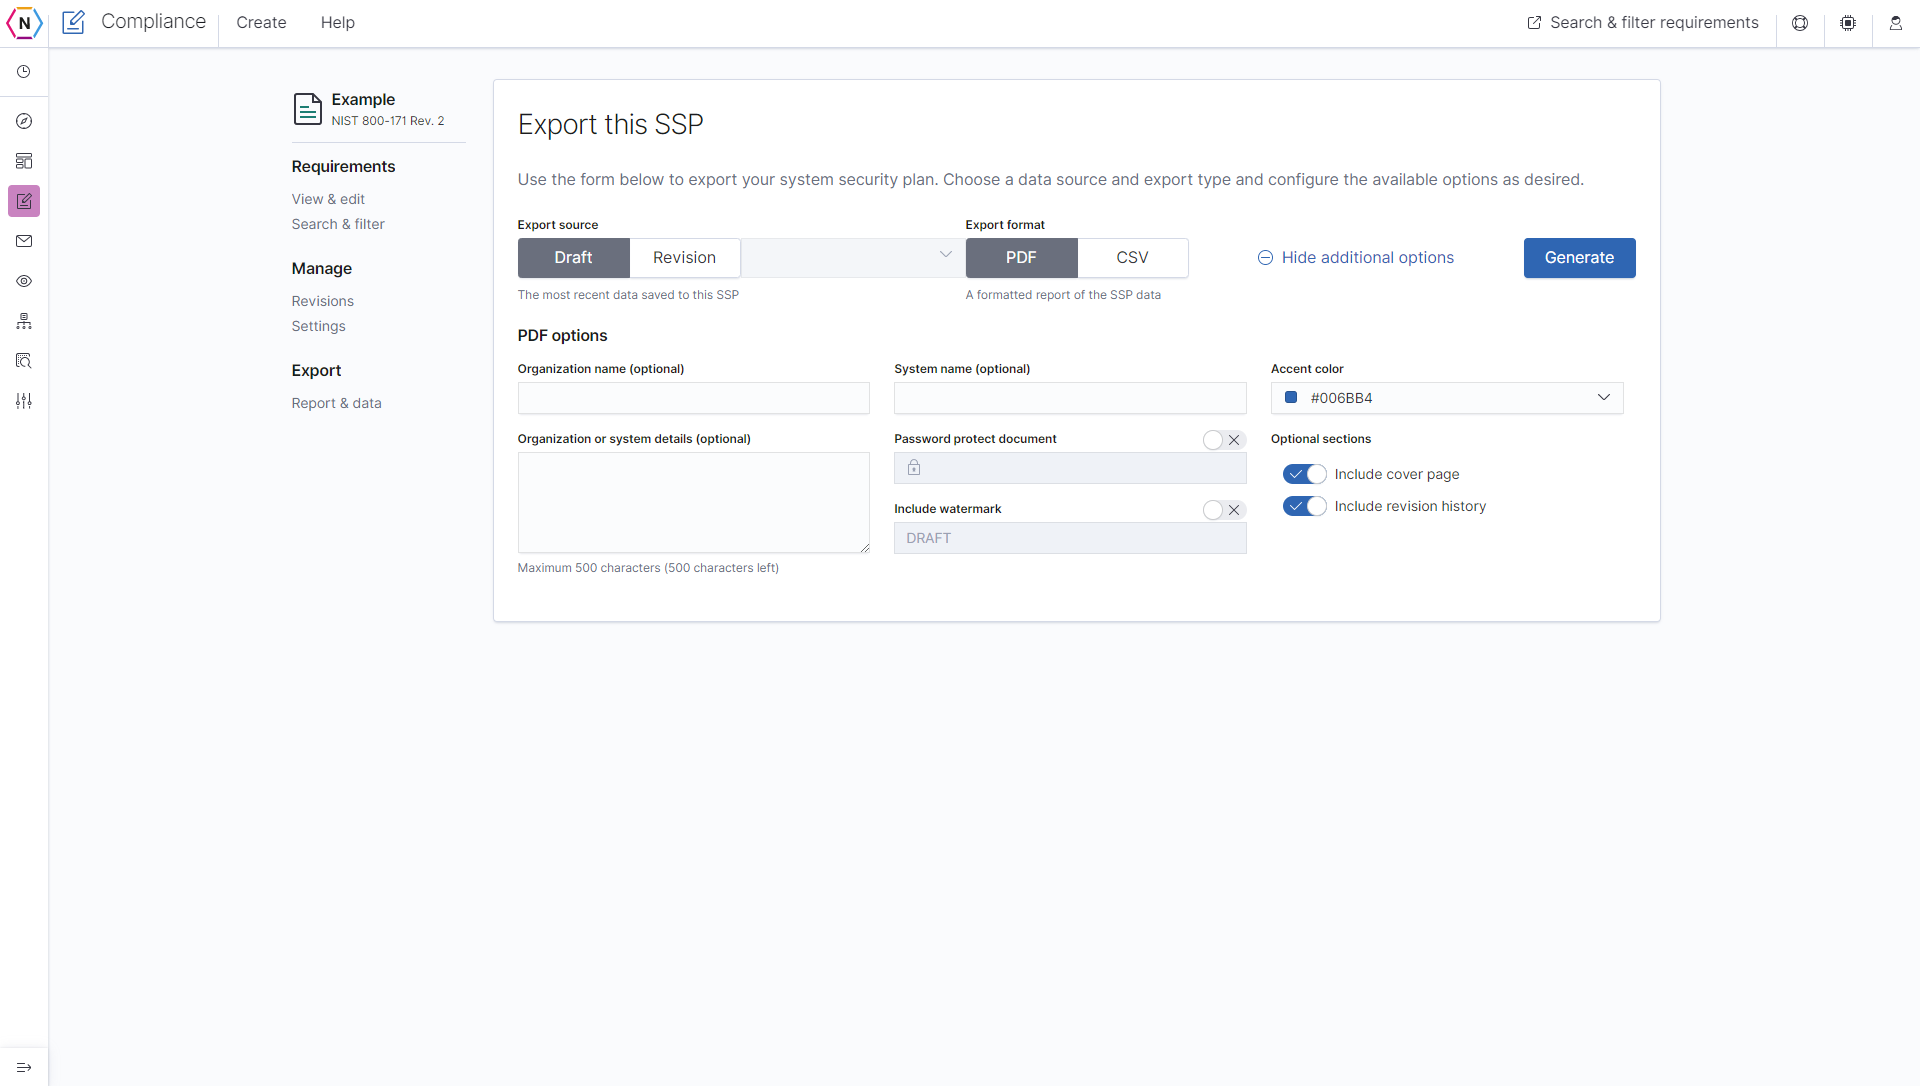
You are also able to create a POAM of sorts by first making sure the Export Format is set to PDF, filter controls for Partially Implemented, Planned, Not Implemented and then filter tasks for To Do and In Progress. Finally make sure to have Exclude Controls without Tasks filter on and you’re all set to export!
SPRS Score:
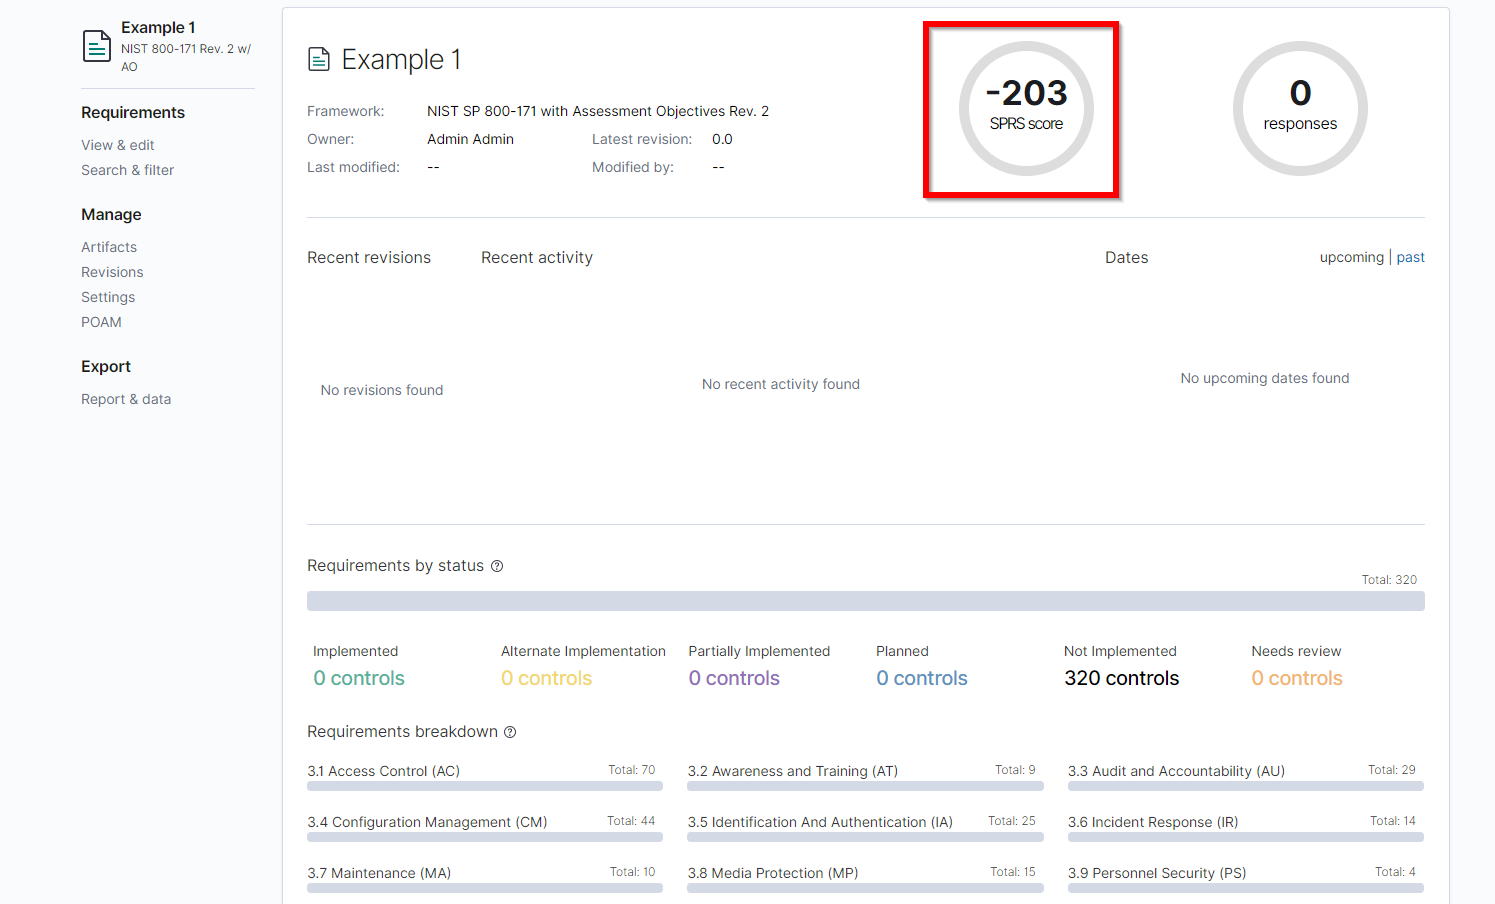
For SSPs using NIST SP 800-171 for their framework an SPRS Score can be found included on the top right corner of the SSPs main page. This score is used to determine your overall compliance with NIST.
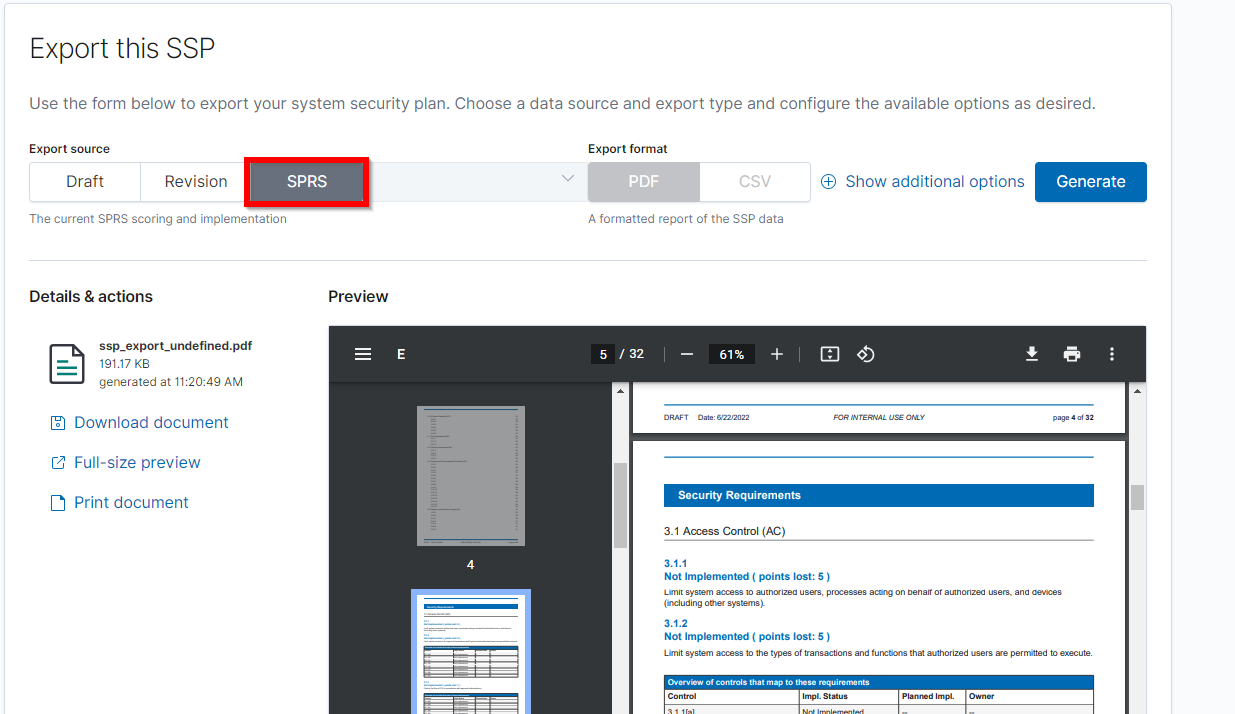
The SPRS score can also be printed out alongside your SSP on the Report & Data page.
Granting Access to non-admin Users
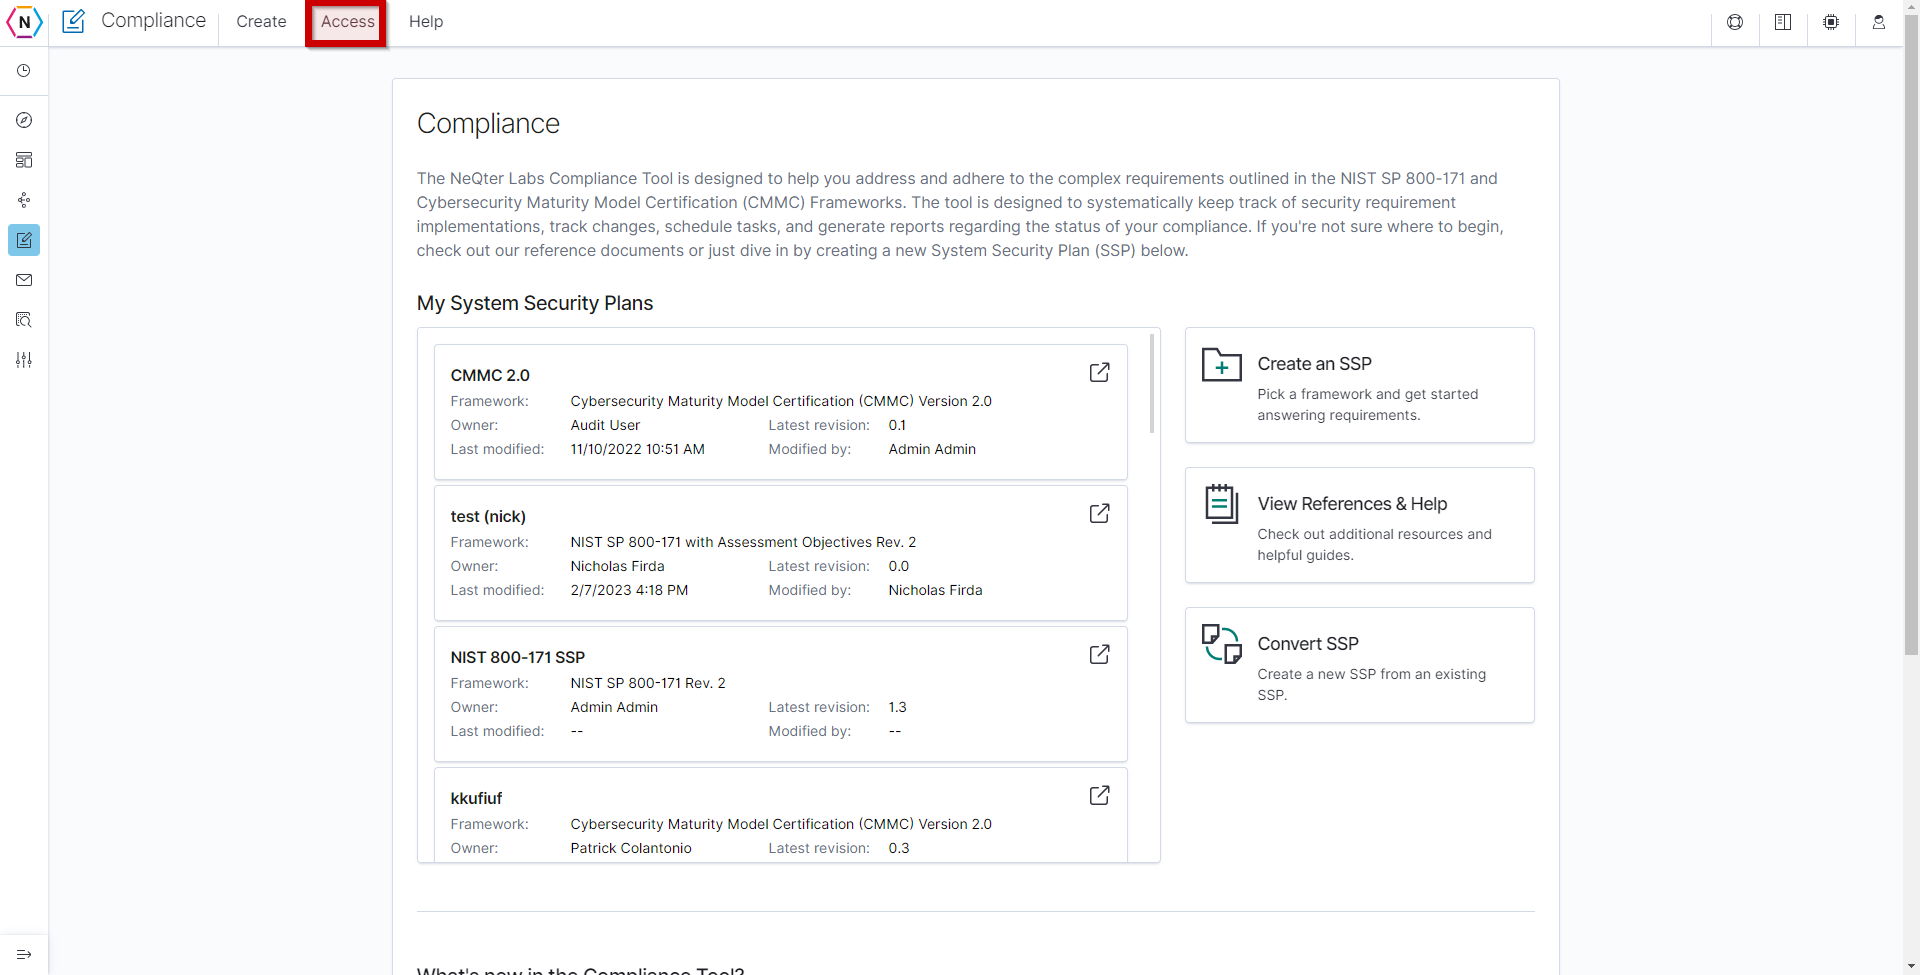
Users who are not given permission to access certain SSPs by default / non-admin users will not be able to access SSPs by default. In order to grant non-admin users access to certain SSPs an admin account must first verify the user has access to the compliance tool under the User Settings found under the NeQter Settings. If the User does have access to the compliance tool, then returning the Compliance tool, select Access on the top navigation bar as highlighted below.
Selecting Access will bring up a pop out window like shown below. In this window you can select any SSP on your system and see what users have access to it. To modify any access configurations click on the Modify Access button when selecting the SSP you’d like to edit.

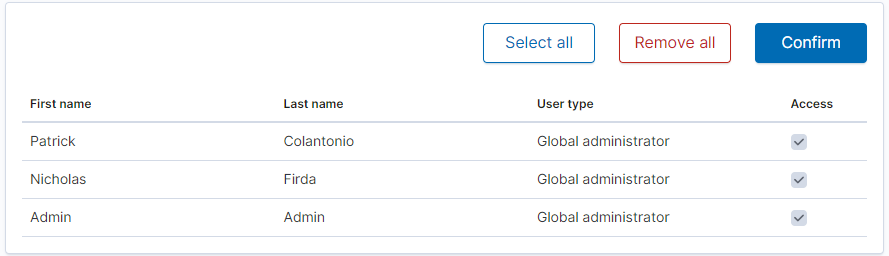
When the Modify Access button is clicked you will be given a list of users with a checkbox next to each which can be used to grant or remove access. To grant access or remove access from all non-admin accounts you can click on the Select All and Remove All buttons respectively. As shown in the example below, accounts that are admin accounts have their access checkbox disabled, making them unalterable. When finished editing access permissions click the Confirm button on top to complete and now permissions will be updated.
Converting SSPs
Disclaimer: This conversion tool is not intended to be a perfect solution for upgrading and moving between frameworks. Your responses, implementation statuses, tasks, etc. are assigned using a ‘best guess’ approach and all controls will require review upon conversion. Artifacts are not imported into the new SSP and will need to be manually inserted.
Users are able to convert SSPs from one format to another by using the Convert SSP tool. This tool allows you to have information copied from one framework (for example CMMC) over to a different one (for example NIST). Users are also able to use this tool to transcribe information from older Framework versions to their newer counterparts such as going from CMMC V1 Level 3 over to CMMC V2 Level 2. Converted SSPs will remain the same with a new copied version being created based off the configuration set by the user.
To utilize the Convert SSP tool, you will first need to have at least one SSP already on the NeQter Core. If there’s at least one SSP available then there will be on the bottom right of the compliance ssp menu a Convert SSP button.
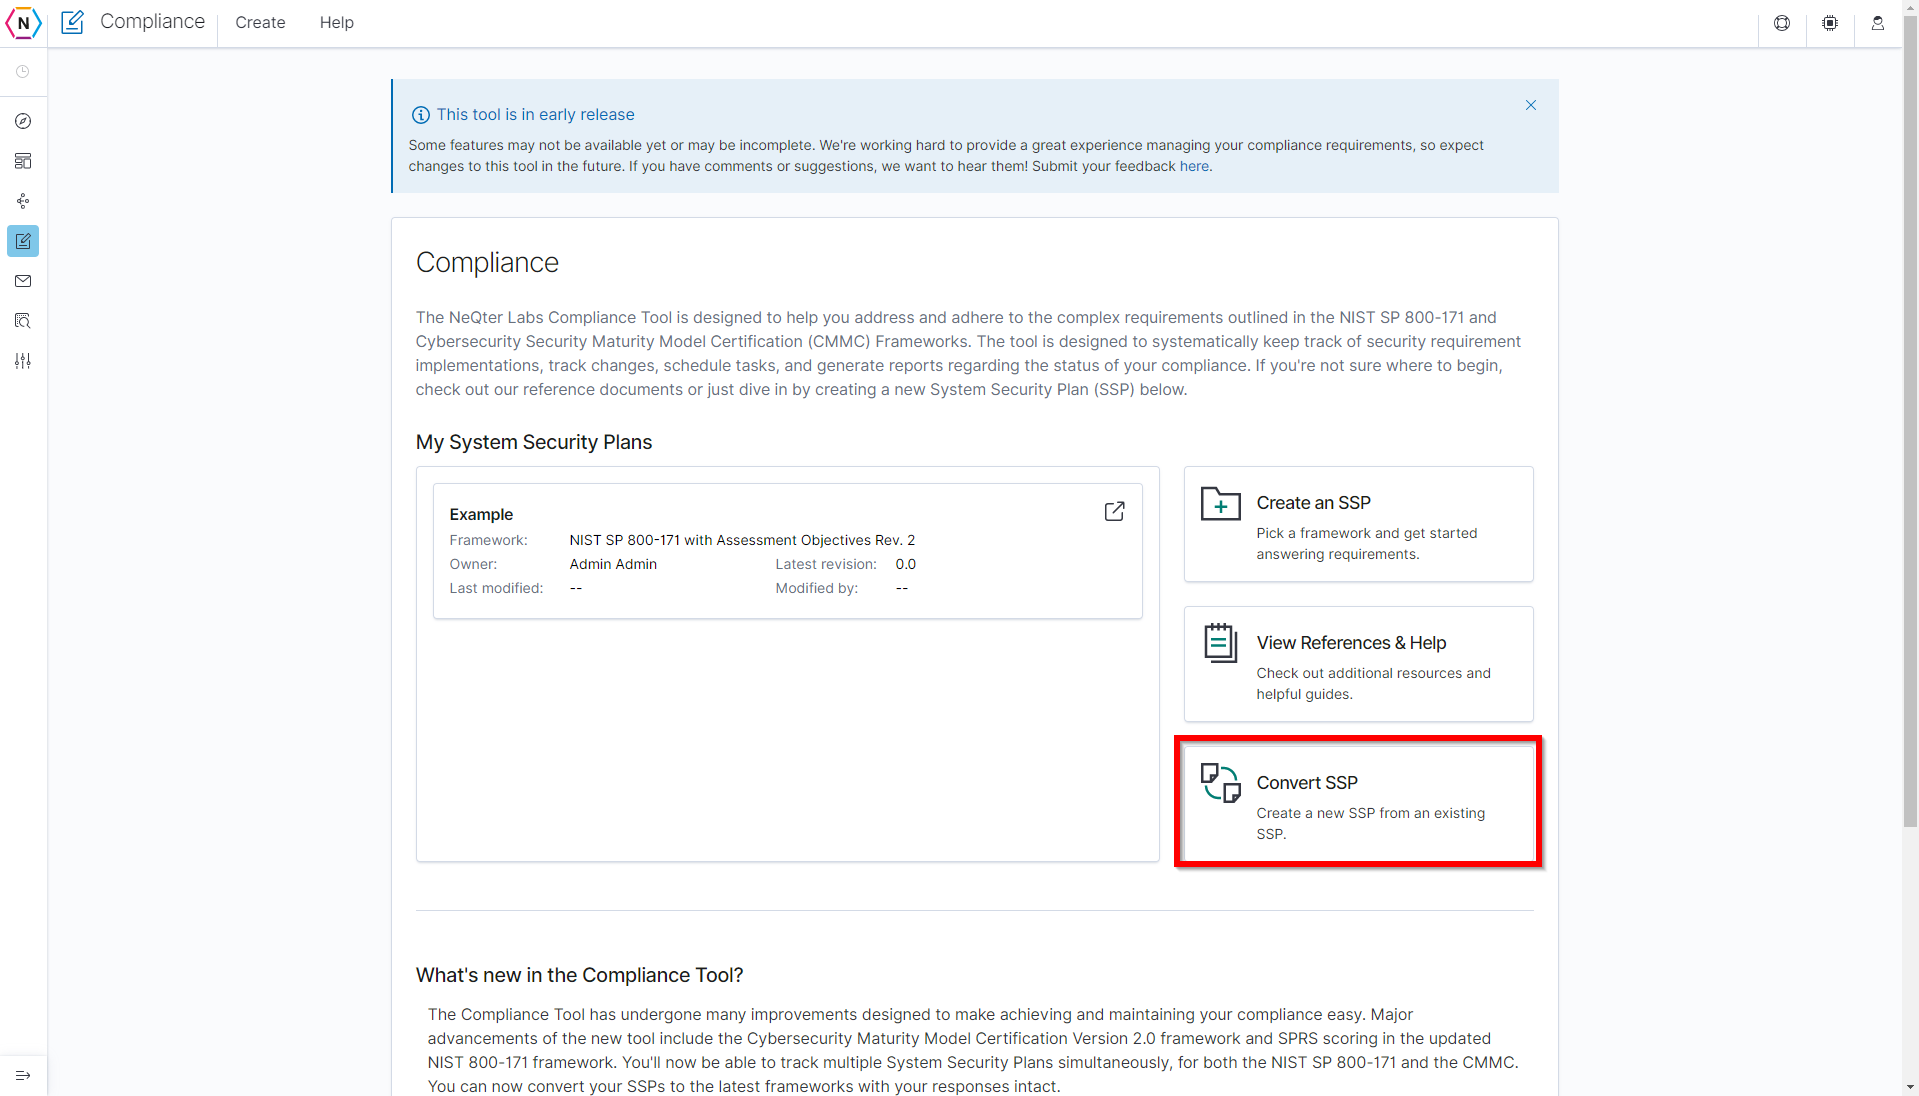
Click on the Convert SSP button to begin setting up a framework conversion.
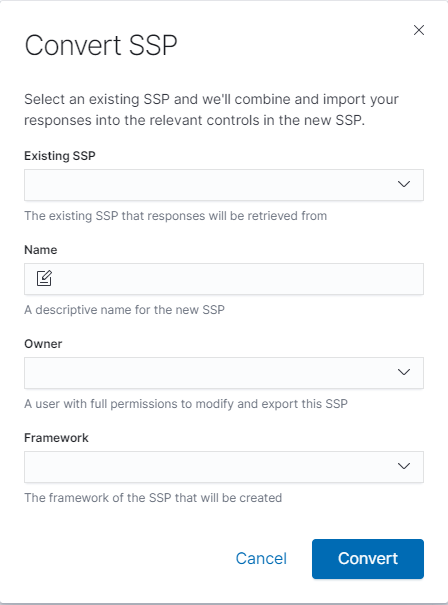
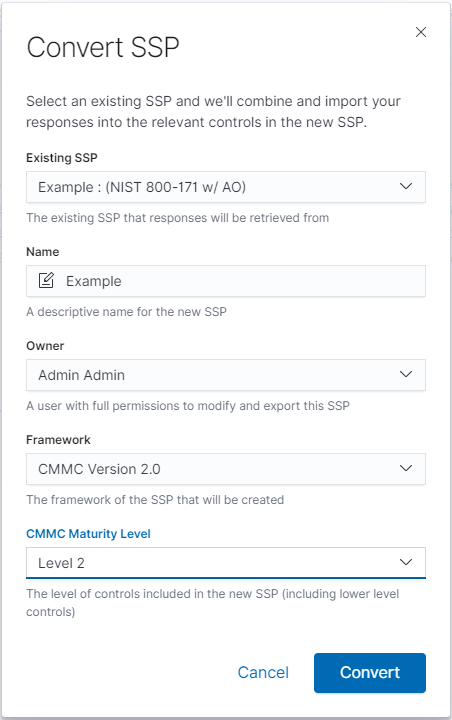
Once in the Convert SSP Window, you will presented with a few drop down menus / text boxes. Below is a list of what each option covers:
Existing SSP: This drop down will contain a list of all SSPs found on the box, you can select from here what SSP you’d like to convert.
Name: This is where a name can be assigned for the new ssp being generated.
Owner: This is where an owner can be assigned for the compliance page.
Framework: This is where users can select between CMMC and NIST frameworks.
CMMC Maturity Level(CMMC framework only): If CMMC is Selected for the framework then this is where users can select what level of cmmc they’d plan to convert over to.
After all the menu items and text boxes are filled, all that is left is to click the Convert button on the bottom right of the window to complete the conversion.
Once finished, a brand new SSP can be found under the compliance main menu, with most of the data of its original ssp converted over. The only data not transferred into the new SSP during conversion is Artifacts which will need to be re-inserted manually. It is Highly suggested that each and every control is looked over for any mismatches, all controls after converting will have a Review Status section added for each control with it set to Needs Review in order to help keep track of what’s been looked at.