
NeQter Labs Initial Setup Guide
First Steps
Video Demonstration
Starting your device
First, mount your NeQter Labs Compliance Engine to your server rack and plug in an Ethernet cable to the Ethernet port labeled Eth 0 on the back of the appliance. Once your NeQter Labs Compliance Engine is mounted and wired, connect a monitor to its VGA port, and a keyboard into one of the USB ports. Power on the Compliance Engine to begin the boot process. Once completed, you should see this login prompt:
NOTE: If you use a NeQter Labs SOHO product, you will need to place it on a stable ventilated surface (such as a table) and have it connected to a monitor by a HDMI cable instead of a VGA port

- Enter login: neqter
- Enter password: neqter
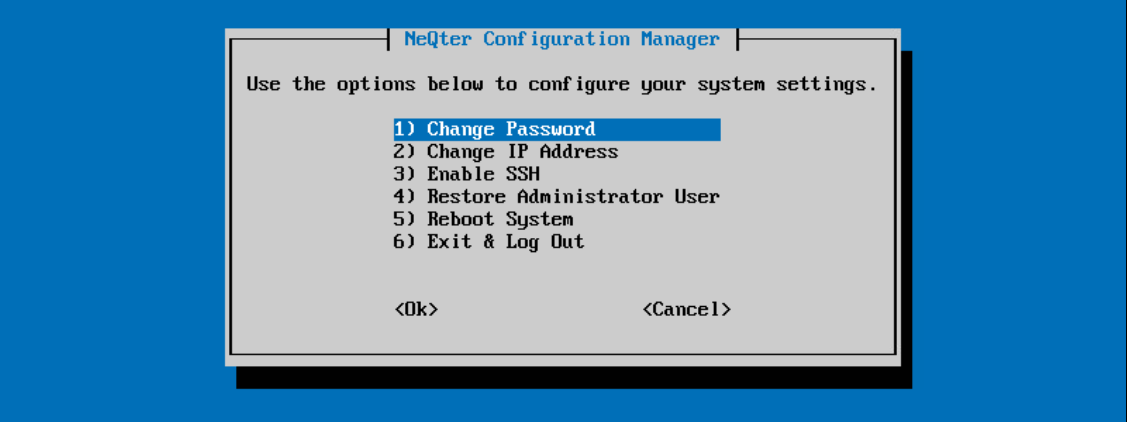
Press the Enter key to proceed to the NeQter Configuration Manager dialogue.

Change Password
Select the Change Password option to change the terminal login password.
Select Yes to continue.
Enter a password that satisfies the minimum password requirements. You are required to enter a password that is a minimum of 8 characters and has each of the following:
- A mixture of upper and lower-case letters
- At least one numeric character
- At least one special character
Click Enter. A new prompt to re-enter the password will appear.
NOTE: It is very important that this login information is kept for future use. The user for this password will remain as neqter.
Select OK to save the password. You should now return to the NeQter Configuration Manager dialogue.
Configure IP Address
We will begin with configuring a static IP address for the NeQter appliance. Using the arrow keys on your keyboard, select Change IP address and press your Enter key.
Key in the static IP address including CIDR notation that has been selected for use with your NeQter appliance, and press your Enter key.
Next you will type in the gateway IP address of your network, and press your Enter key.
Finally, input the DNS server IP address for your network, and press your Enter key.
Review your IP configuration, make sure that you document it, and press your Enter key if everything is correct.
Now you can unplug the keyboard and monitor from the NeQter appliance as you are no longer needed to be directly connected to the NeQter Appliance.
NOTE: If you ever need to unplug or move the NeQter unit, be sure to properly shut it off before unplugging the appliance.
Login to GUI
From a computer which is on the same network as your NeQter appliance, open a Chrome browser. Enter the https IP address that you just configured in the NeQter Configuration Manager dialogue and append port 5000 to the end of the address. For example, 172.16.5.288:5000
NOTE: Chrome is the preferred browser for the NeQter appliance. Some features may not work with an unsupported browser.
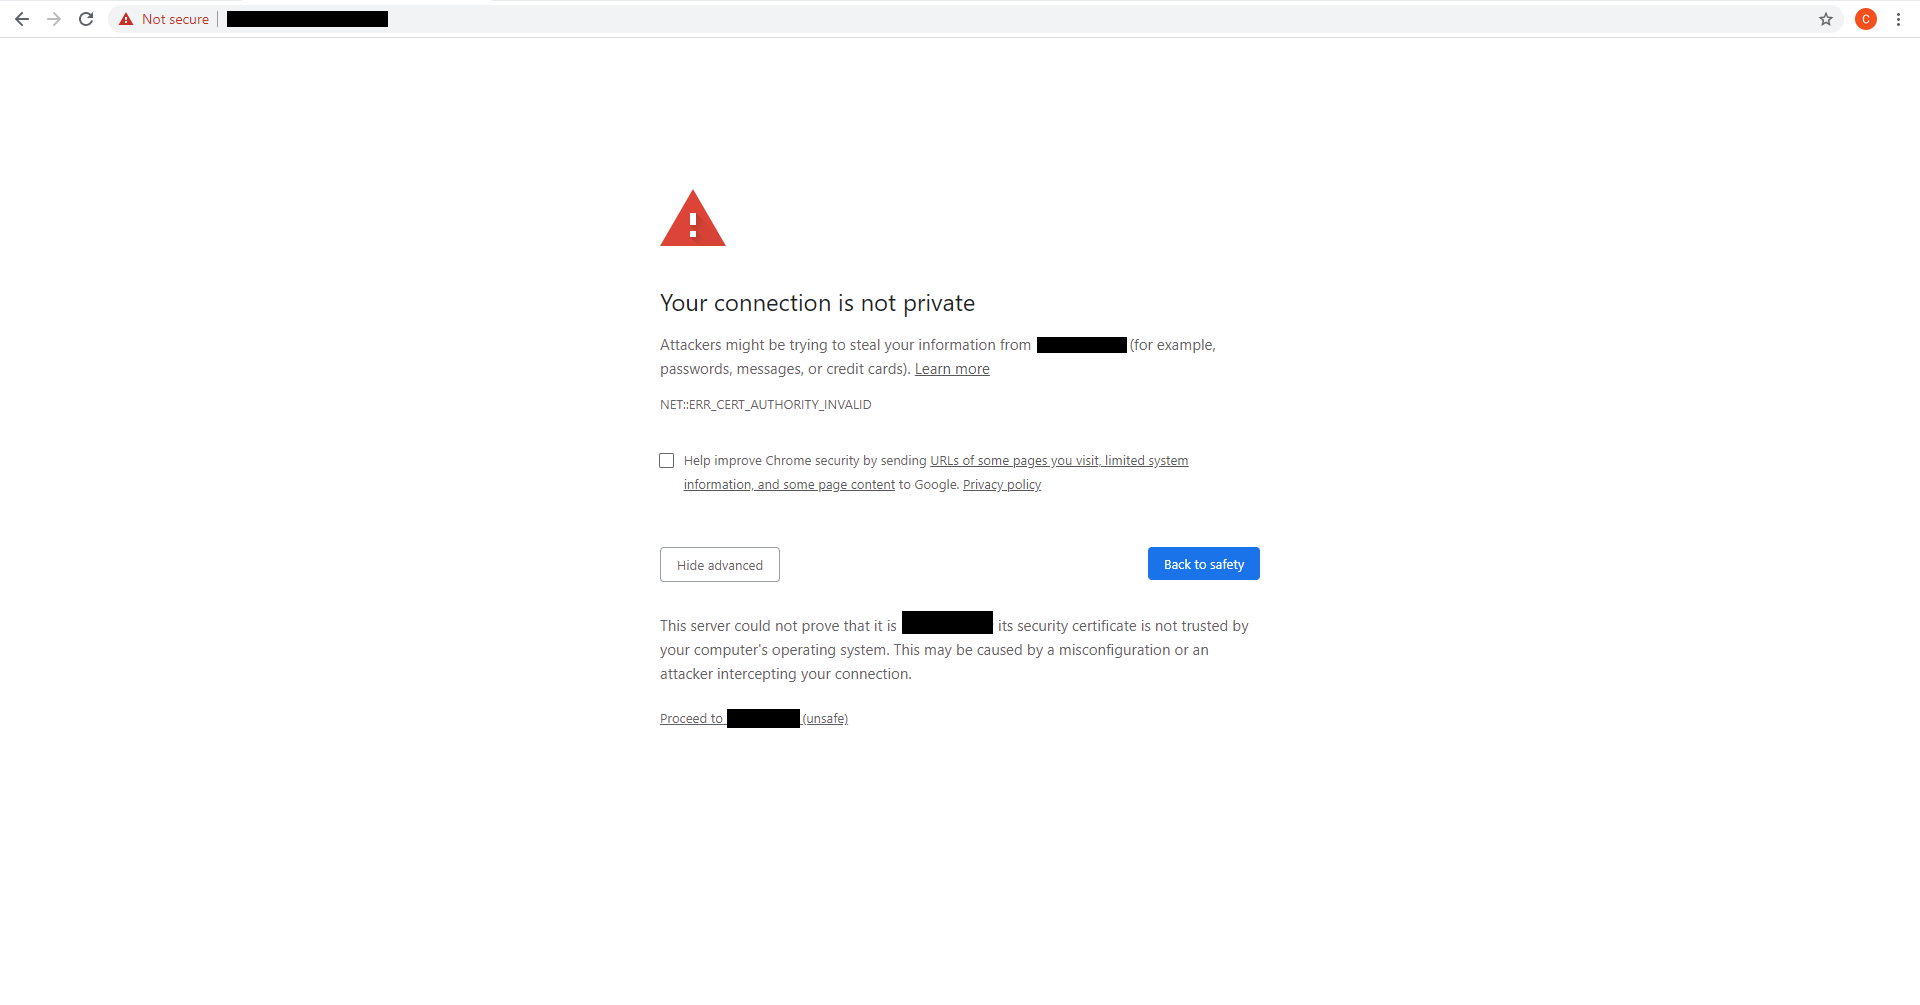
The first time that you visit the NeQter appliance GUI, a privacy error will appear. Click on Advanced to expand for more information, and then choose Proceed to [IP address] (unsafe).
At the NeQter Labs login screen, enter the default administrative credentials:
- Username: admin@neqter.local
- Password: Admin
NOTE: It is very important before beginning your initial setup, to update the appliance to the latest version from Settings > Updates. (This could take some time depending on internet speeds, please plan accordingly) Once the update has been completed, reboot your system.
Change Default Password
The first thing that should be done is to change the default administrator’s account password. Creating and removing accounts will be covered under User Management.
To change the admin password for the time being, click the upper right icon on the page which should be a silhouette of a person and then click on Change Password.
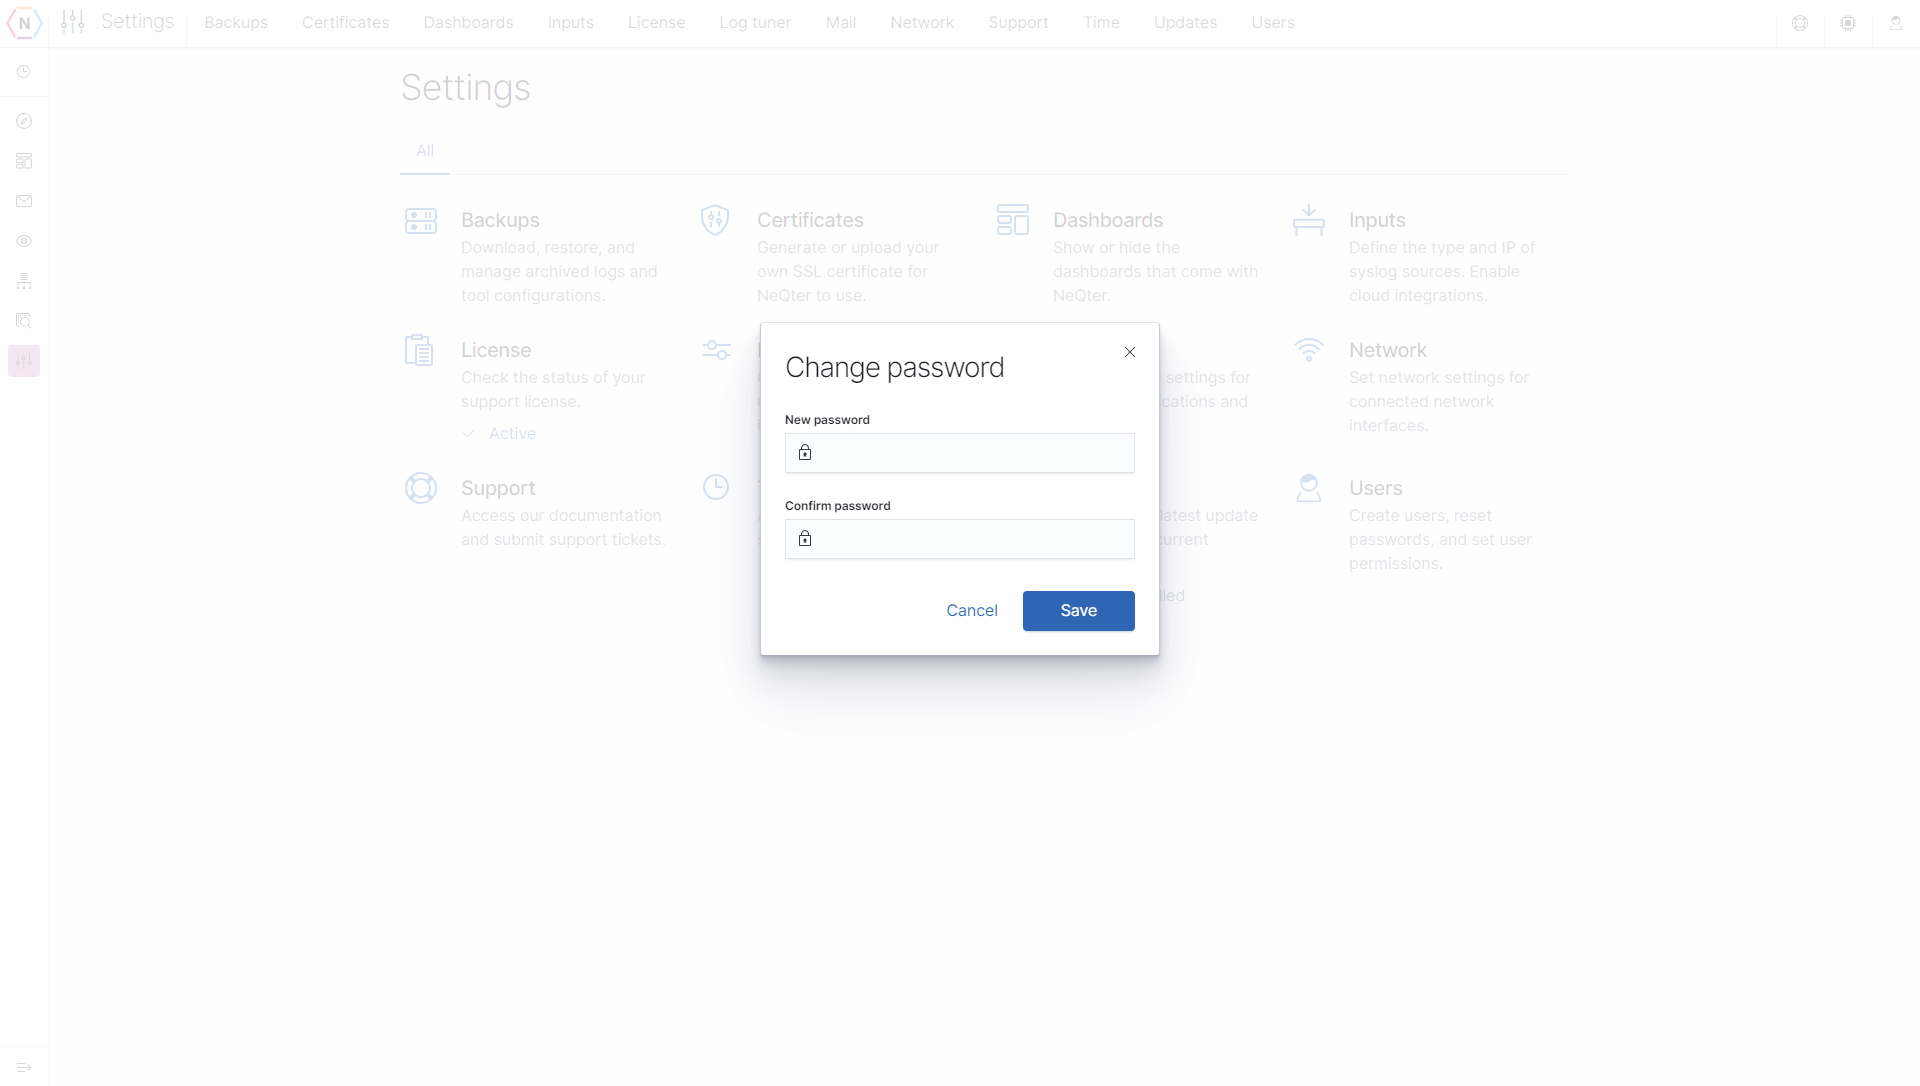
Then enter your new password, re-enter to confirm, and click Save to complete.
Expanding the left navigation bar
A very useful feature, especially when starting out and learning more about the NeQter Client is the ability to extend out the left nav bar. To do this you must bring your mouse to the bottom left corner and click the icon found there, this will bring the navigation bar out further. If you wish to lock the bar in place you can click the lock icon found on the bottom right of the left nav bar when extended outwards.