
NeQter Labs How to Guides
Table of Contents
Agent Manager Deployment Guide
The Windows Agent Manager tool allows an organization to collect and keep detailed information about workstations & servers on its network such as hardware specs, installed software, event IDs and device metrics. The current version fully supports Window 10 / 11 systems and their server counterparts (2016,2019,2022 & 2025 respectively). There are multiple methods of deploying our msi installation file which are listed below:
- A group policy object in Active Directory
- Software application(s) that are able to deploy msi installation files such as Intune.
- Manually Installation
On this documentation page you can find out how to setup the Agent Manager to send via a group policy object as well as how to setup an agent manager on a stand alone device. We do not cover installation via Intune or other 3rd party software deployment software but the msi file should work like any other msi installation file deployed via these software. See our GPO guide below for instructions how to prepare the file for deployment via this method as well.
To begin, you will need to first download the Agents and GPO Templates folder which can be found below:
MSI File GPO Configuration
Once you have the Agents and GPO Templates folder downloaded you will need to next unzip the folder and then open the msi file called NeQter Labs Agent Manager-2.19.1 using an msi editor such as Orca.

NOTE: If you do not have an msi Editor or need help using Orca you can check our documentation here for more information.
With the file opened you will need to go to the properties of the msi file and change the value under the NEQTERIPADDRESS field to the IP Address of your NeQter appliance. Once you have that done you can either click the Save icon on the top left and exit or if you’d like to not have a shortcut appear on each device the msi file is pushed to you can also have the shortcut configured to not generate by following the instructions found here.
Next you will need to place the msi file you just edited into a share folder on your local device that is accessible by all devices on the network you’d like to have it pushed out to (A good catch all for deploying this to all domain computers is Domain Computers as an example).
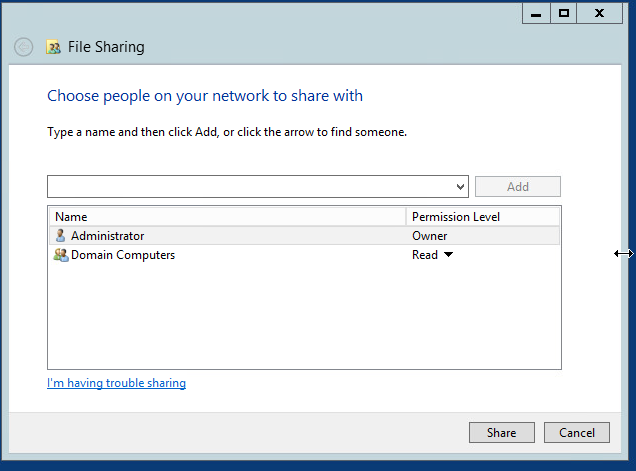
NOTE: Make sure when sharing to use device groups / names AND NOT user groups or names for the share as the GPO when pushing out the msi will only be able to use devices.
Once a share is created with the proper permissions, open up the group policy management tool.
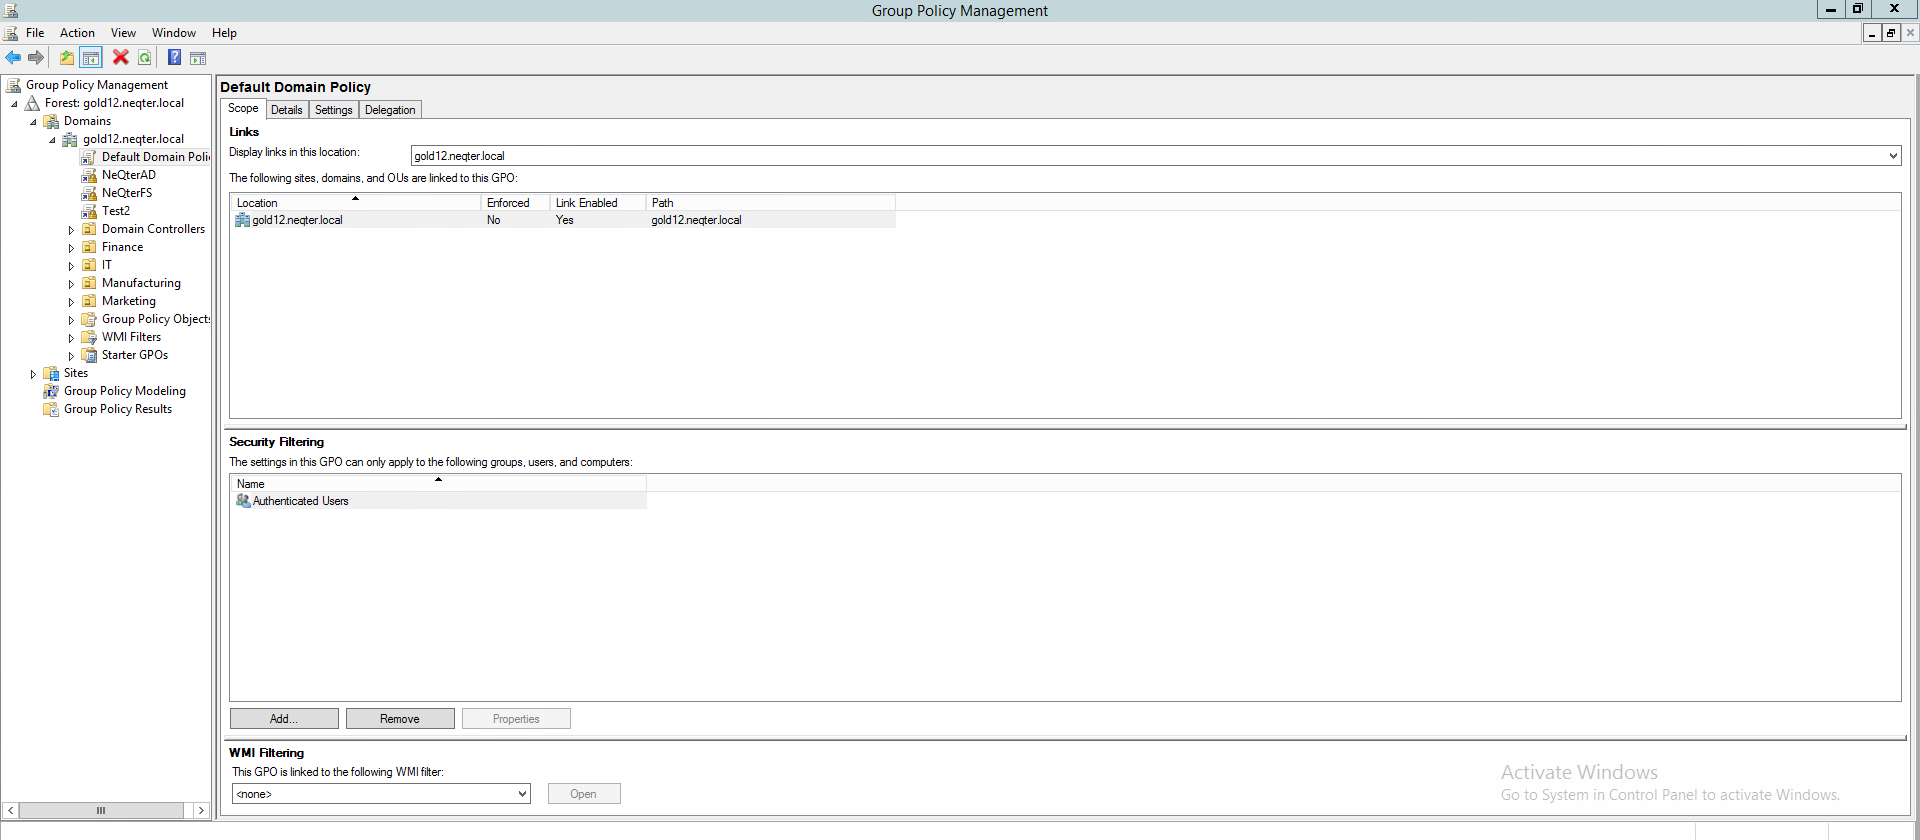
From here right click your domain and click on the create a GPO… button in the drop down, make sure to give your new group object a relevant name for easier navigation if you need to find this GPO again, a name such as NeQter Agent Deployment for example will do fine.
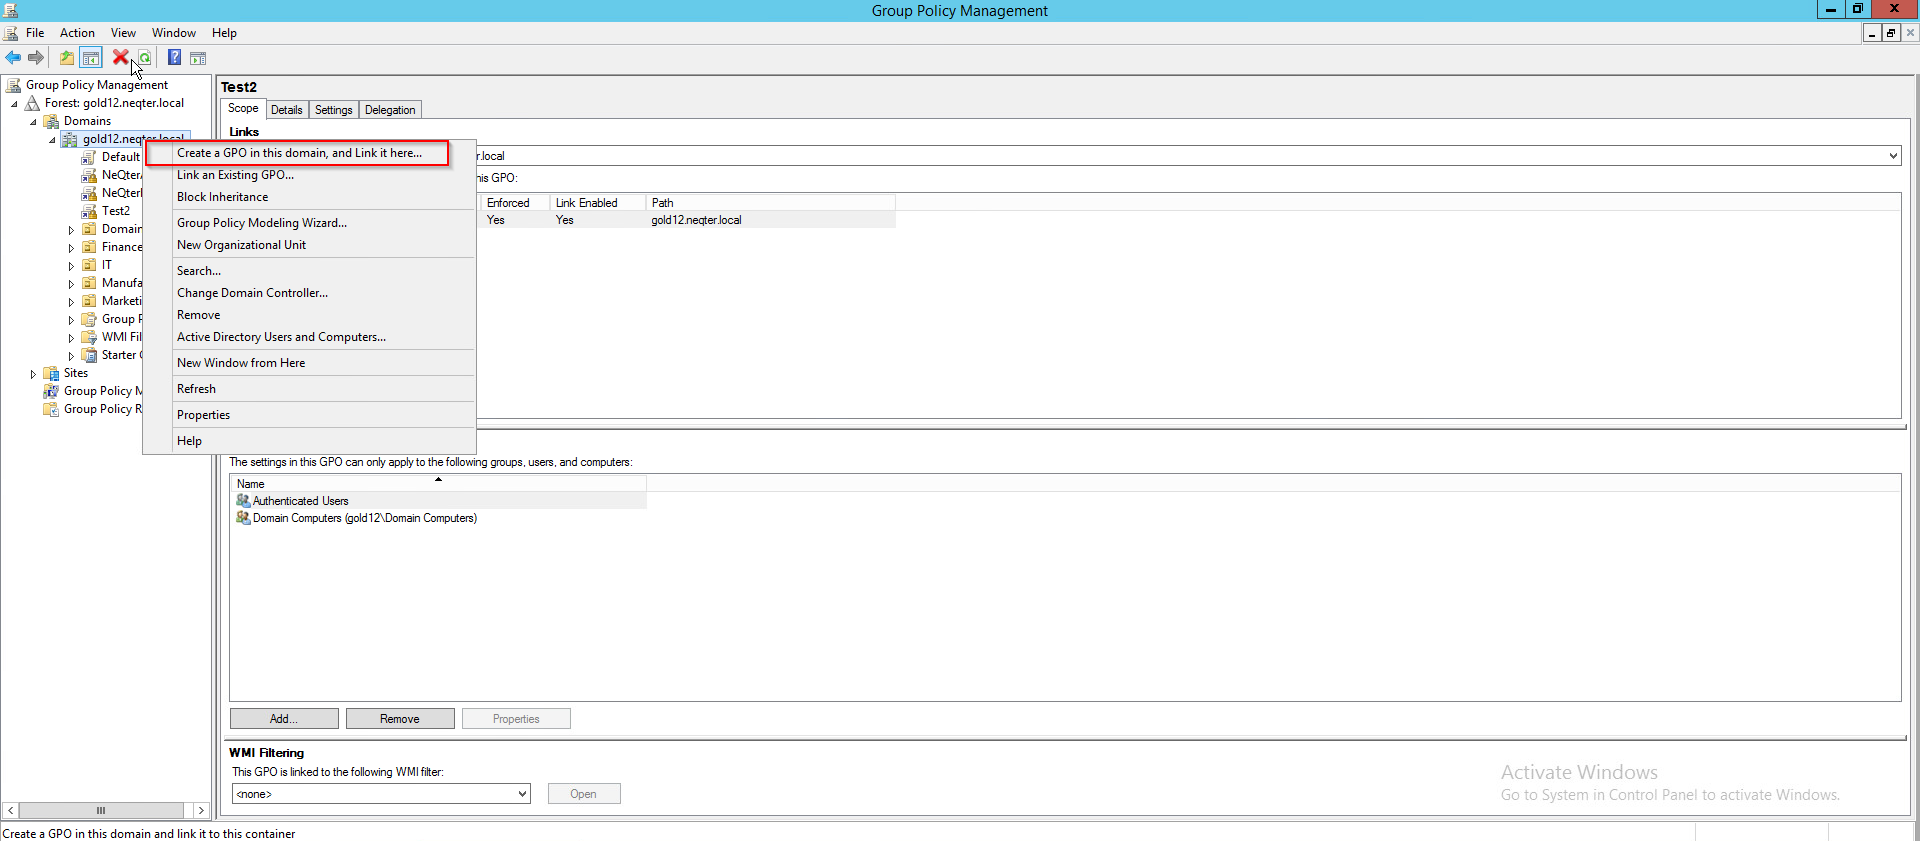
Once finished you can click create and then you should now see your new GPO. Next click on your new GPO and click add under the security filtering section on the right hand side of the group policy management tool.
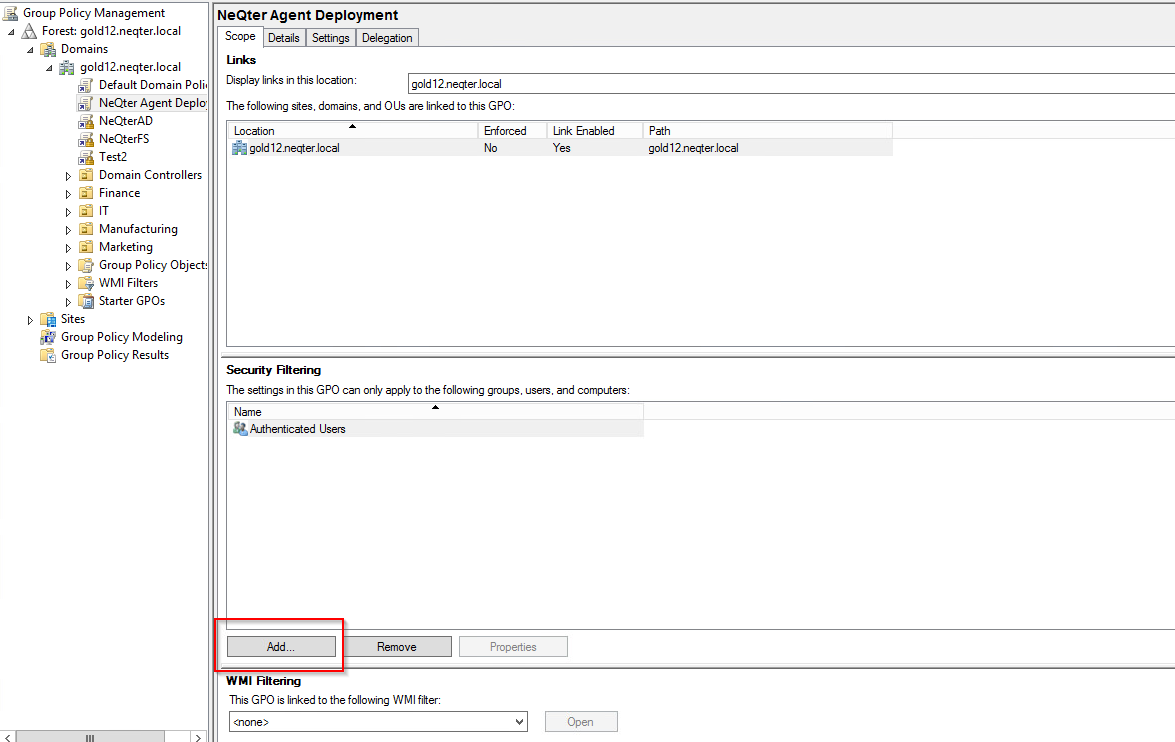
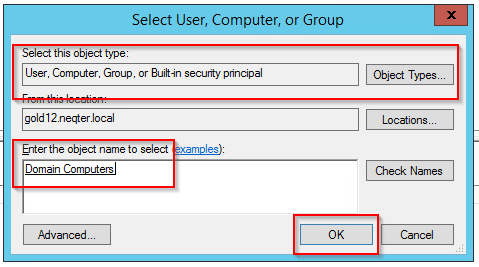
From the window you are presented go to object types and make sure computers is checked, click ok and then under the enter the object name… section insert the device / device group you’d like to have this GPO pushed to. If you plan to push out to all domain devices you can put in the default group domain computers. Once done, click check names to see if it matches any device / device group you have, if it does the name should now be underlined and you can click ok to finish.
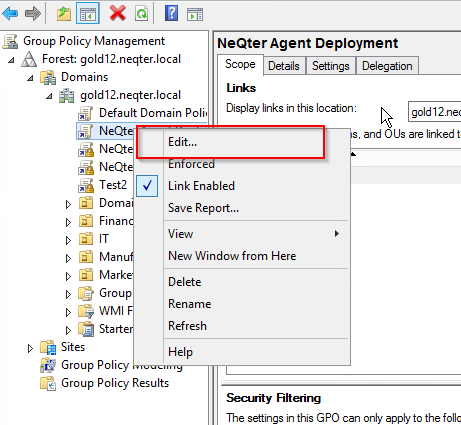
After that you will want to right click on your GPO and click on the edit button.
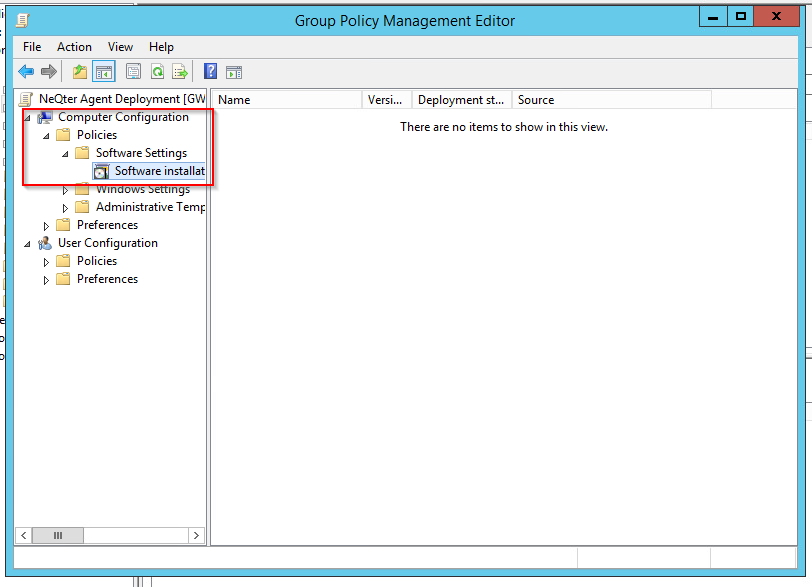
You will be brought to the following screen from which you will need to navigate to computer Configuration > policies > software settings > software installation on the left nav.
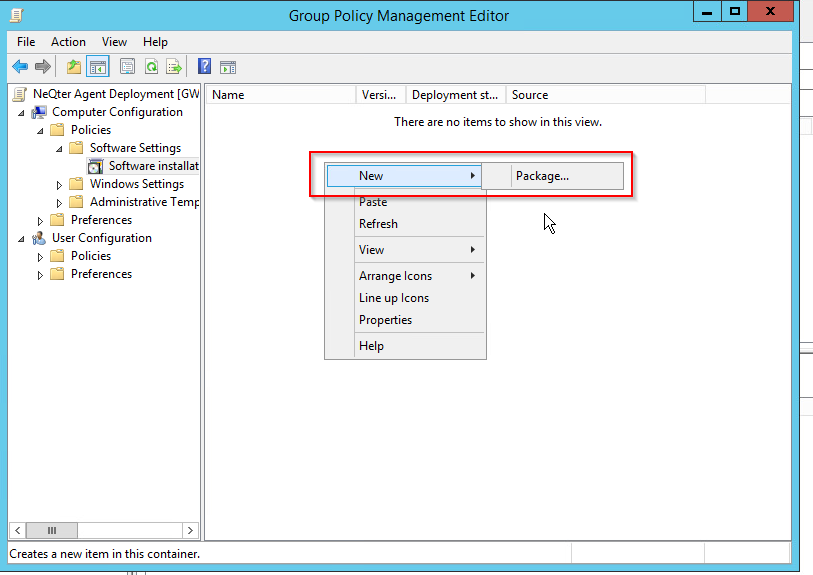
Once on the software installation section, right click in the center of the right window and click new > package
From here you will need to browse to find the msi file you edited earlier, make sure when doing this that you navigate via the share path (UNC path) and NOT via the location on your local drive like in the example below:
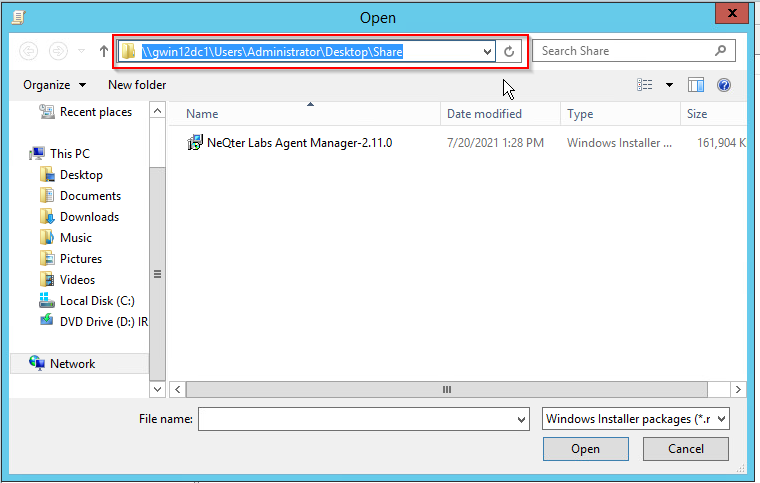
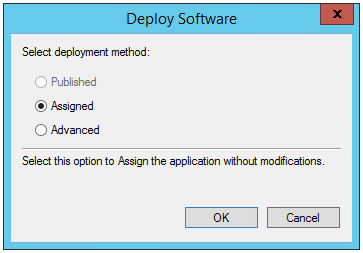
When the file is found click open and then make sure to have the settings set to assigned and click ok to finish.
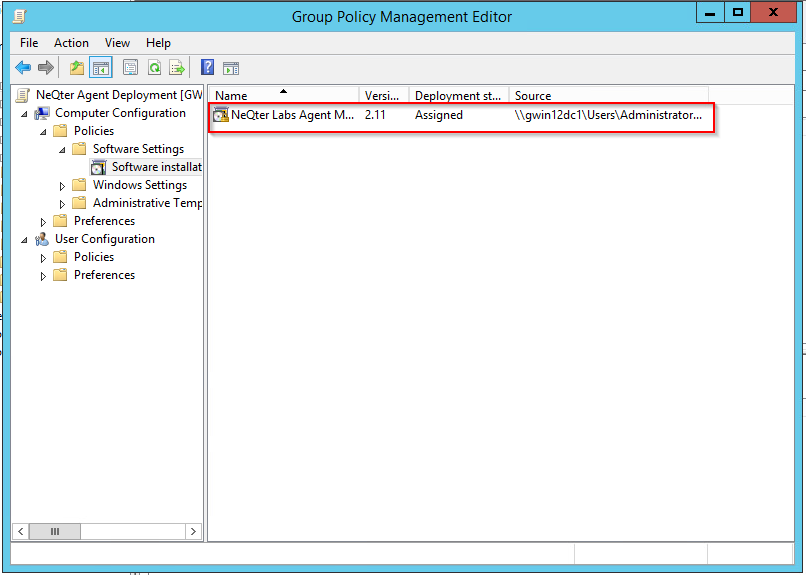
If everything worked properly you should now see the installation file, version number and source in the software installation section.
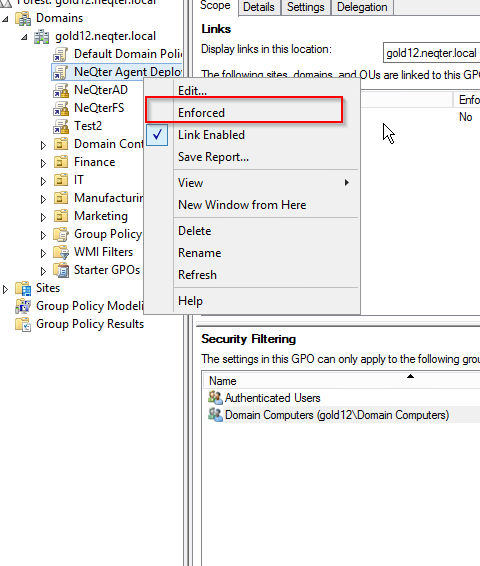
From there you can exit out of the group policy management editor and then right click your GPO once again to enforce your new policy by clicking on the enforced button.
Finally, make sure to run a gpupdate /force command in the command prompt of your AD to push out your new group policy. Devices will need to be restarted in order for the installer to be pushed onto devices on the network and can take a few restarts before installing.
MSI Local Device Configuration
In this section we’ll quickly go over how to setup the Agent Manager on a single device. First you will need to download the Agents and GPO Templates folder which can be found below:
Once you have the Agents and GPO Templates file downloaded you will need to next unzip the folder and then run the msi installer. The msi installer is rather straight forward, click next a few times and then click install. Once finished installing you can click finish to exit the setup wizard and now you should see the NeQter Agent Manager shortcut on your desktop unless removed via an msi editor.
Click on the shortcut to open up the manager which will bring up a window like the one below (if no shortcut on the desktop look for a NeQter folder found under Program Files for the .exe file to run the Manager GUI ):
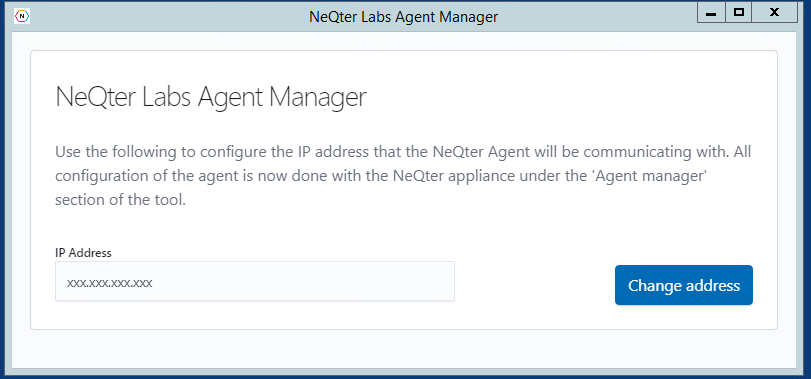
Insert the IP Address of your NeQter Core and then click the Change Address button to save.
Orca Installation for MSI Editing
If you do not have an MSI editor you can download and install one by going to Microsoft’s website and download their SDK package .
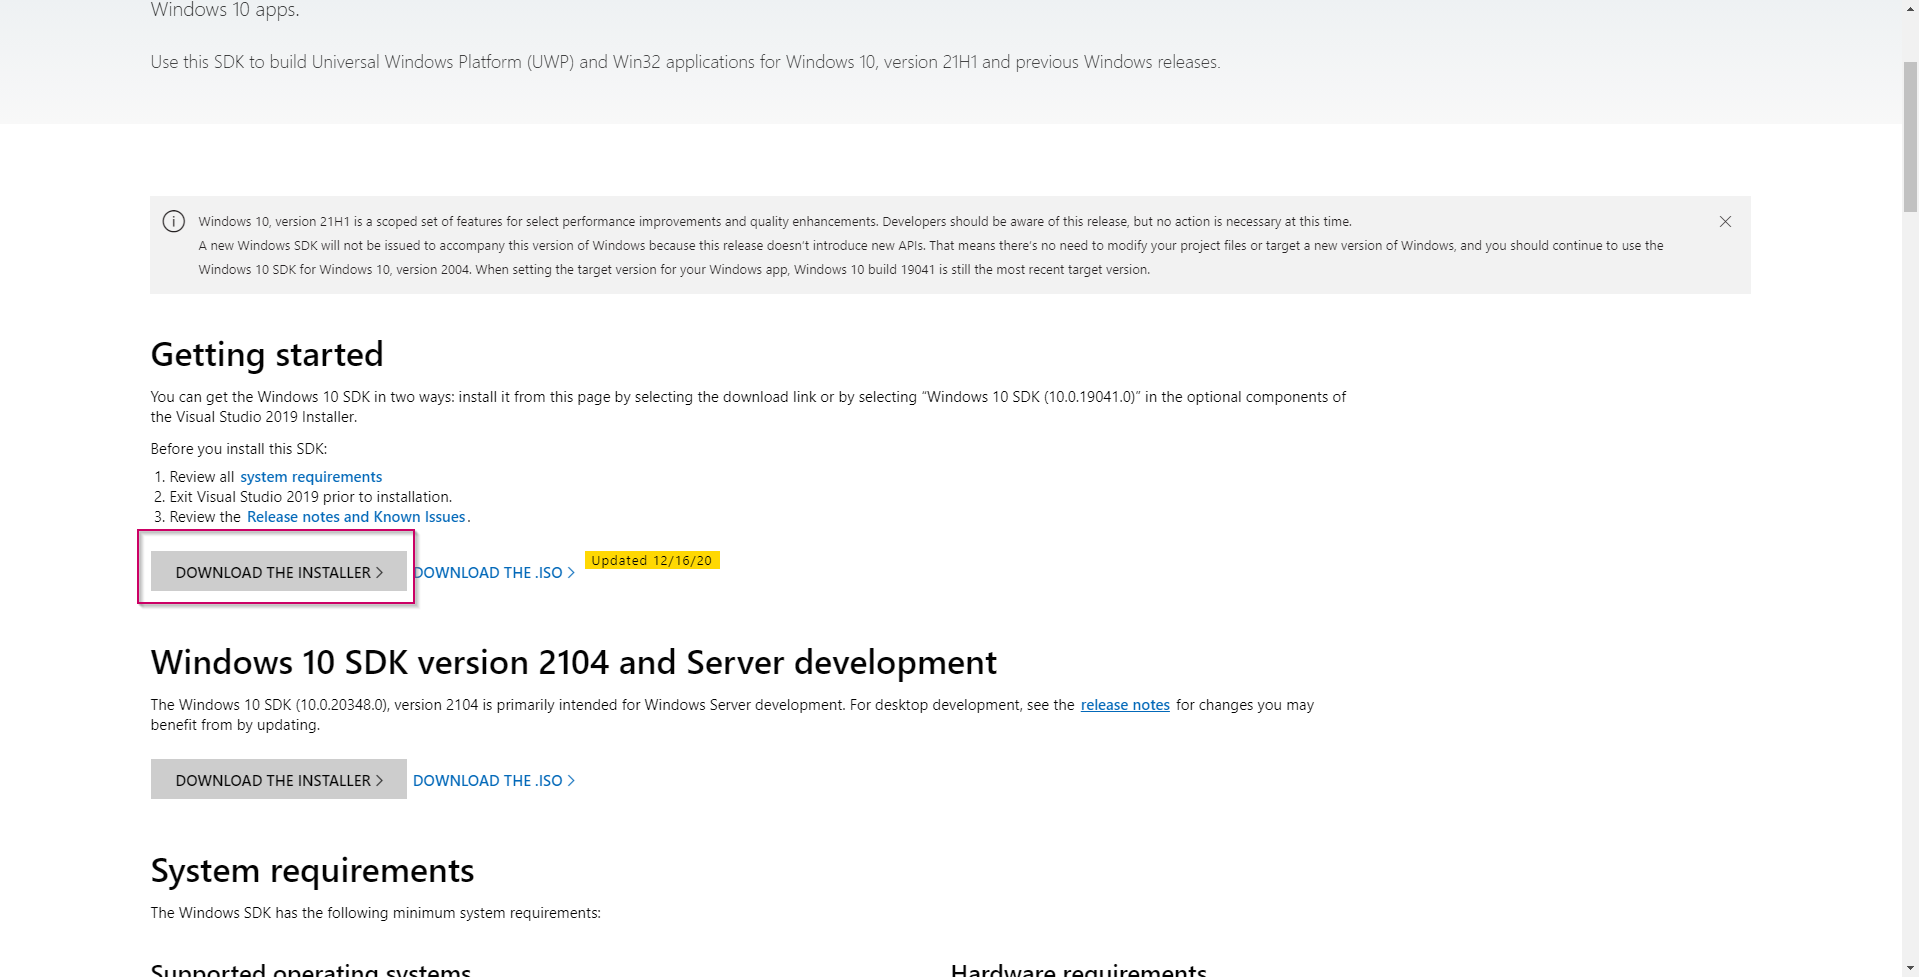
NOTE: The software needed requires at least Windows Server 2012 R2 or above to function
Once downloaded run the file and go through the installation wizard until you reach the section shown below (and if you don’t want data sent to Microsoft make sure to select no under Windows Kits Privacy).
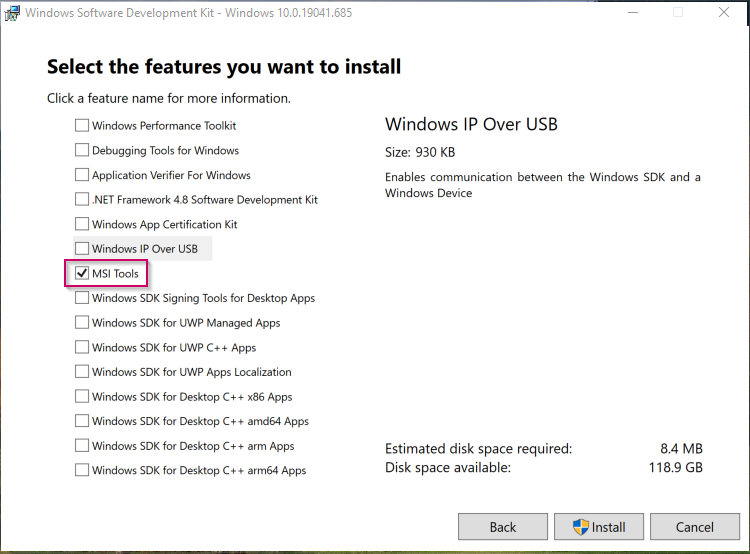
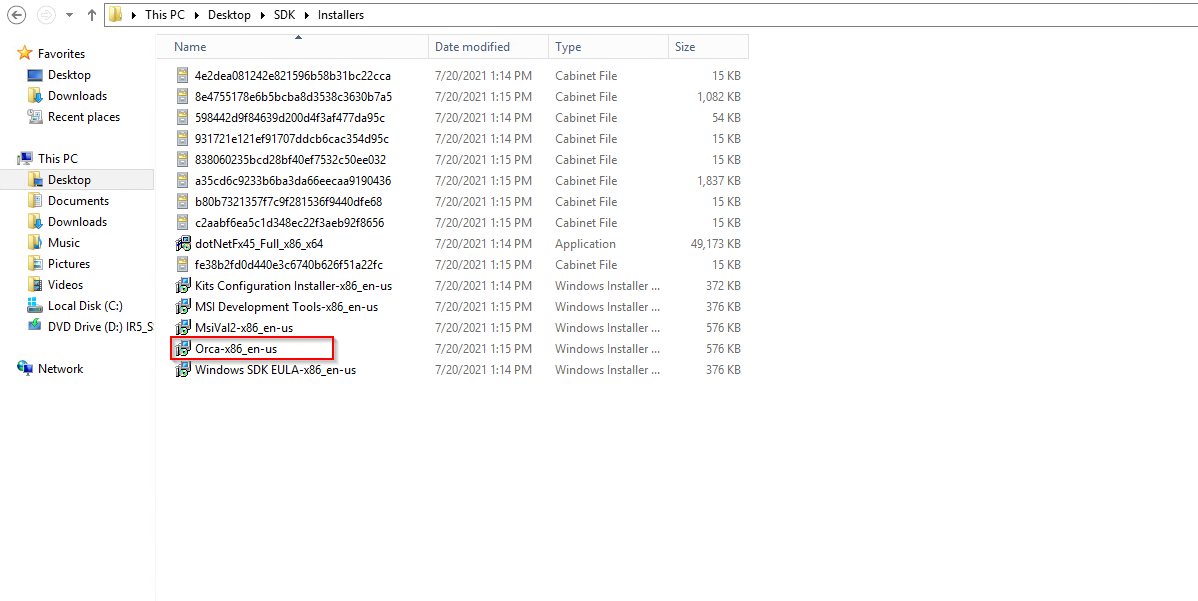
Once there, check off all items except for msi tools and click Install to finish. After that all you will need to do is go to the folder you just installed (should be called SDK) and navigate to the Installer folder and click on the Orca-x86_en-us installer file to install the Orca msi editor.
Updating Agent Deployment
Periodically a new version of the agent manager will be released which will require updating the GPO used to deploy the older version.
To begin, first you will need to edit the newer agent manager in the same fashion shown in the beginning of the GPO Configuration section.
Once the msi file is ready you will next need to navigate to open up your Group Policy Management Tool. From there right click on the GPO used to deploy the Agent Manager and click Edit. From there navigate to Computer Configuration > Policies > Software Settings > Software Installation.
Once on the Software Installation you will need to right click on the msi File and under All Tasks click on the Remove button.
From there select Allow users to continue to use software… option so that the NeQter Agent isn’t accidentally removed before being replaced with a new MSI file and click Ok. After that you can follow the remaining steps found under the GPO Configuration section to complete pushing out your new msi agent.