NeQter Labs FAQ
Table of Contents
Removing Problem NVTs
If your Vulnerability Scanner is causing a lot of headaches due to particular NVTs causing issues, for example a brute force login NVT causing 50+ Failed Logins on a device, you can turn off certain NVTs by following the steps below:
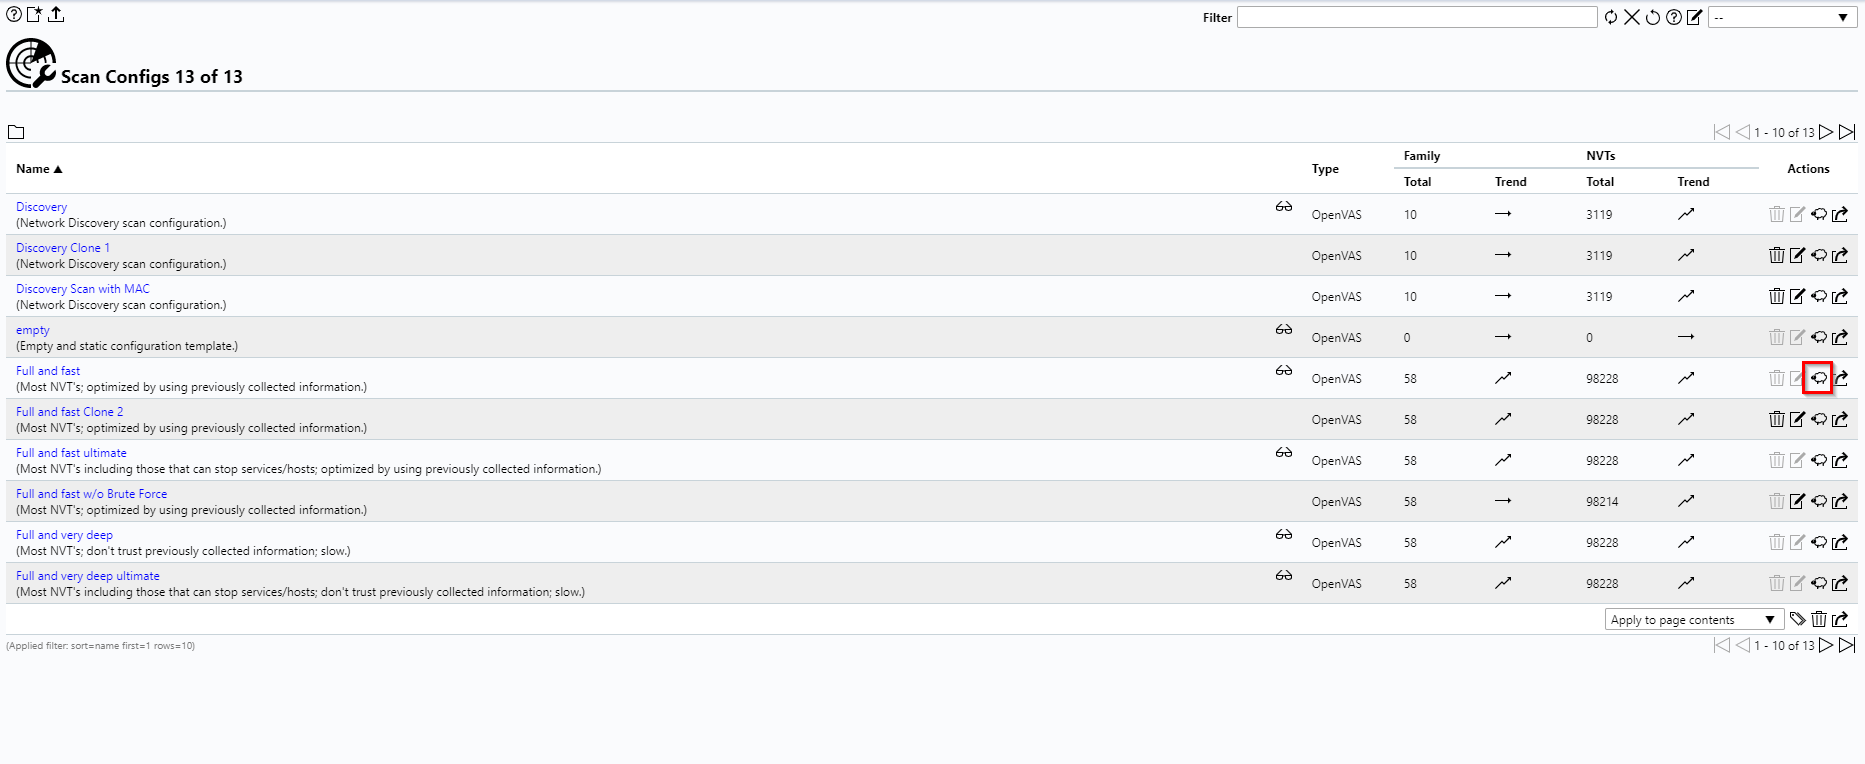
Step 1: Navigate to Vulnerability Scanner > Configuration > Scan Configs.
Step 2: Clone the scan you want to remove a NVT from, for example if you’re using “Full & Fast”, click on the Clone (Sheep Icon) button located on the same row.
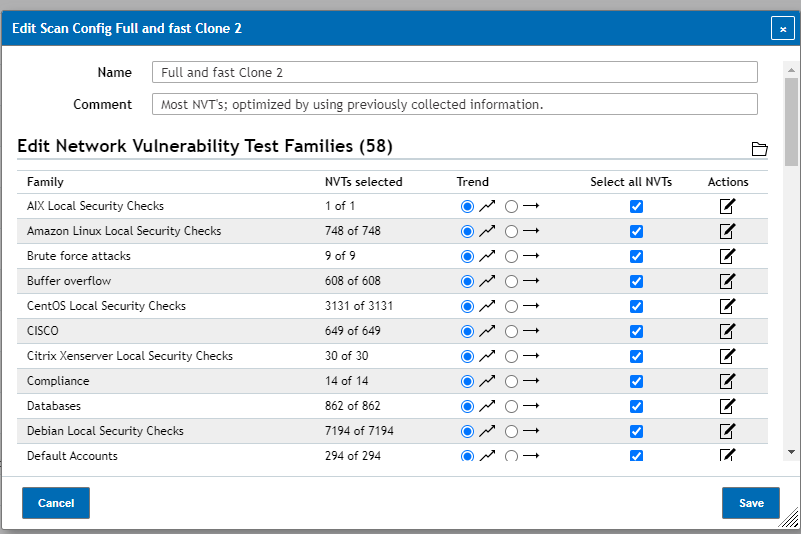
Step 3: Once Cloned, click the edit button (Paper and pen Icon) to edit the newly created Scan Configuration.
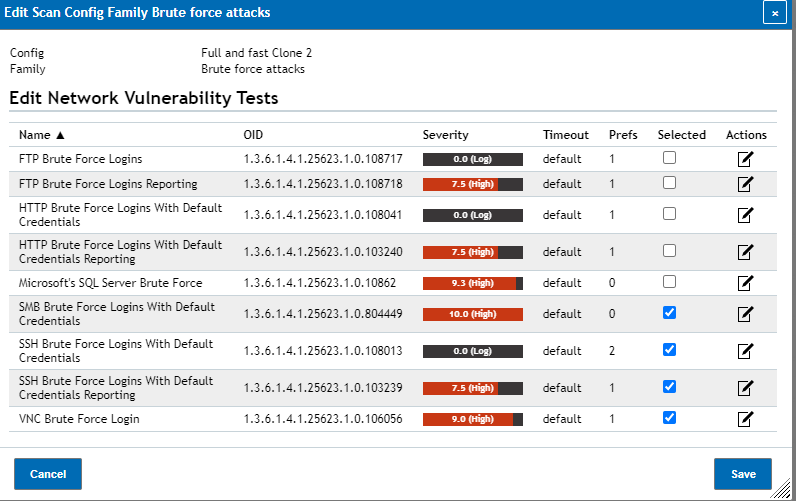
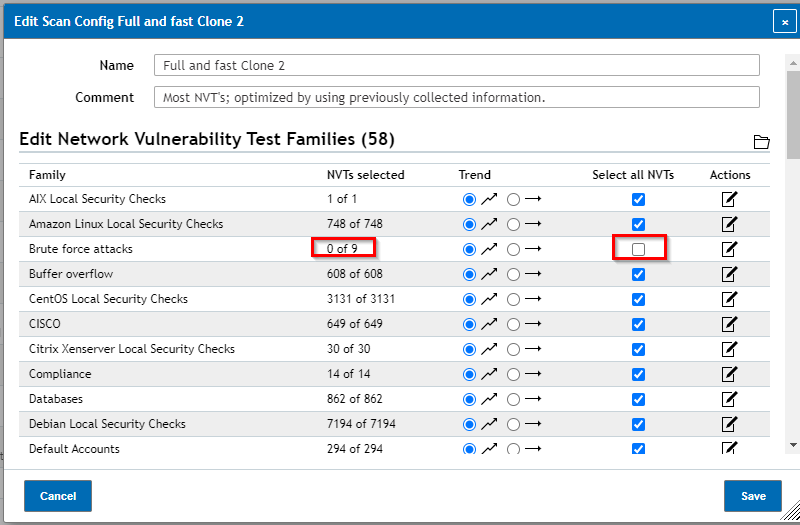
Step 4: You should now find yourself in a window similar to the one above, from this window you can select what NVTs you want to have being run during a scan. You can either disable NVTs individually or disable entire groups of them.
Step 5: Once the NVTs you want disabled are un-selected, click Save and then return to the scan task causing the issue involving NVTs for you and replace the previous scan config with your edited one.
Common Trouble NVTs
Brute Force Attacks
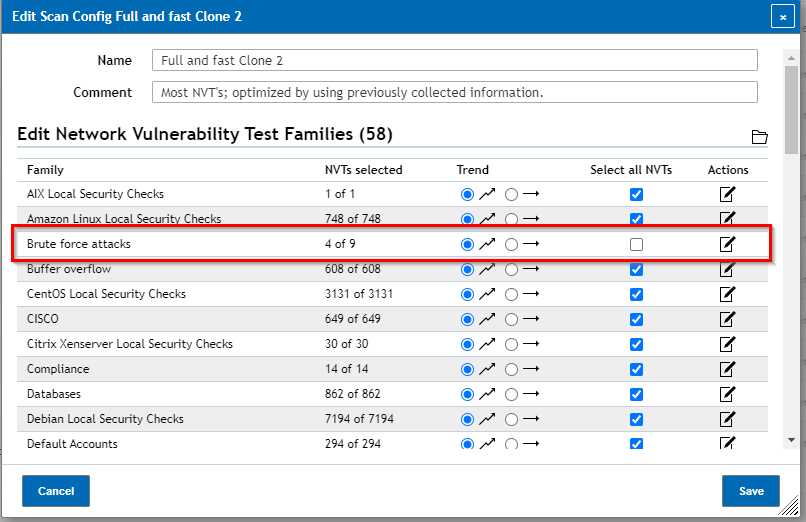
Brute Force Attacks are a very common problem NVT to deal with as they can cause 100s of login failure messages to pop up depending on how one’s network is configured. In order to negate this issue, you can quickly turn off a Scan Config’s Brute Force Attack Vector by un-selecting all Brute Force Attack NVTs.
